Create a blog using Astro
live-export: A tool to export notes programmatically and continuously
Inkdrop focuses on leveraging the full possibilities of Markdown's popularity. For example, Markdown is widely supported in static site generators like Astro, Gatsby, Jekyll, Hugo, and more. As you may know, a lot of people are writing their blog posts in Markdown already (more strictly, GitHub-flavored Markdown). So, it is suitable not only to take tech notes but also to publish tech articles.
Inkdrop provides a seamless experience between devices and platforms, which allows you to read and write Markdown anywhere. However, it sacrificed the affinity with local file systems for the sync feature. To solve that, we've created live-export, which allows you to export notes 'programmatically' to your local filesystem.
A flexible way to work in the filesystem
Why do you need it? Inkdrop can export notes in Markdown from the application menu. But you can't specify the file name format, the directory structure, or which ones to export or not, based on the metadata. live-export solves that issue by providing a flexible API for you to specify them programmatically. On top of that, as its name says, it can export 'continuously' as changes occur in Inkdrop. Which means that you can write articles while checking the actual look of your site like so:
Pretty neat.
Well, let me give you a quick demo. This website is built with Astro and written with Inkdrop:
The source code is available here:
https://github.com/craftzdog/craftzdog-uses
Looks nice, right? :)
You have full control of your data, site design, and where to deploy
How does it work? live-export is not a plugin of Inkdrop. Instead, it runs separately in the terminal, accessing to your data via the local Inkdrop server. Here is an example code that imports notes from a notebook:
import { LiveExporter, toKebabCase } from '@inkdropapp/live-export'

const liveExport = new LiveExporter({
  username: 'foo',
  password: 'bar',
  port: 19840
})

const sub = await liveExport.start({
  live: true,
  bookId: '<YOUR_BOOK_ID>',
  // Pre-process the specified note. It is useful to update the frontmatter information based on the note metadata
  preProcessNote: ({ note, frontmatter, tags }) => {
    frontmatter.title = note.title
    // Convert note title to kebab case (eg. "kebab-case-note-title")
    frontmatter.slug = toKebabCase(note.title)
    frontmatter.tags = tags.map(t => t.name)
  },
  // Generate a path to export the specified note
  pathForNote: ({ /* note, */ frontmatter }) => {
    // export only if it's public
    if (frontmatter.public) {
      return `./<PATH_TO_EXPORT_NOTES>/${frontmatter.slug}.md`
    } else return false
  },
  // Generate a URL for the specified note. It is necessary to link from the note to another note
  urlForNote: ({ frontmatter }) => {
    if (frontmatter.public) {
      return `/<URL_TO_LINK_NOTES>/${frontmatter.slug}`
    } else return false
  },
  // Generate a path and URL to export the specified image file
  pathForFile: ({ mdastNode, /* note, file, */ extension, frontmatter }) => {
    if (frontmatter.slug && mdastNode.alt) {
      const fn = `${frontmatter.slug}_${toKebabCase(mdastNode.alt)}${extension}`
      const res = {
        filePath: `./<PATH_TO_EXPORT_IMAGES>/${fn}`,
        url: `./<URL_TO_LINK_IMAGES>/${fn}`
      }
      // If the `alt` attribute of the image is 'thumbnail', use it as a hero image
      if (mdastNode.alt === 'thumbnail') {
        frontmatter.heroImage = res.filePath
      }
      return res
    } else return false
  },
  // Post-process the specified note right before writing the note to a file. It is useful to tweak the Markdown data
  postProcessNote: ({ md }) => {
    // Remove the thumbnail image from the Markdown body
    const md2 = md.replace(/\!\[thumbnail\]\(.*\)\n/, '')
    return md2
  }
})
As you can see, live-export is tool-agnostic, so you can basically use it in any static site generators. You have full control of your data, directory structure, site design, and where to deploy. Even if you stopped using Inkdrop, the blog posts stay in your git repository. No lock-in!
Create a blog quickly from a template
Let's learn how to use it.
As I mentioned above, live-export access to your data via the local Inkdrop server.
So, you first have to enable it by editing the config.json file stored in the user data directory:
- on macOS:
~/Library/Application Support/inkdrop/config.json - on Windows:
%APPDATA%\inkdrop\config.json - on Linux(deb/rpm):
~/.config/inkdrop/config.json - on Linux(Snap):
~/snap/inkdrop/current/.config/inkdrop/config.json
Quit Inkdrop, and add the following lines like so:
{
  "*": {
    "core": {
      "server": {
        "enabled": true,
        "port": 19840,
        "bindAddress": "127.0.0.1",
        "auth": {
          "username": "foo",
          "password": "bar"
        }
      }
    }
  }
}
Then, relaunch the app. You can check if it works properly by running the following command in the terminal:
curl http://foo:bar@localhost:19840/
# => {"version":"5.5.1","ok":true}
Now, it's ready to export notes with live-export! I've made a blog template so that you can quickly build blogs with live-export:
https://github.com/inkdropapp/inkdrop-blog-template
The template is built with Astro, one of the static site generators that focus on speed.
Clone the repository into your project directory:
git clone git@github.com:inkdropapp/inkdrop-blog-template.git ./your-blog
cd ./your-blog
Then, install the dependencies:
npm install
# Or, yarn install
Next, create a .env file in the project root directory as follows:
DEBUG='inkdrop:export:info,inkdrop:export:error'
INKDROP_USERNAME='foo'
INKDROP_PASSWORD='bar'
INKDROP_PORT=19840
INKDROP_BOOKID='<BOOKID>'
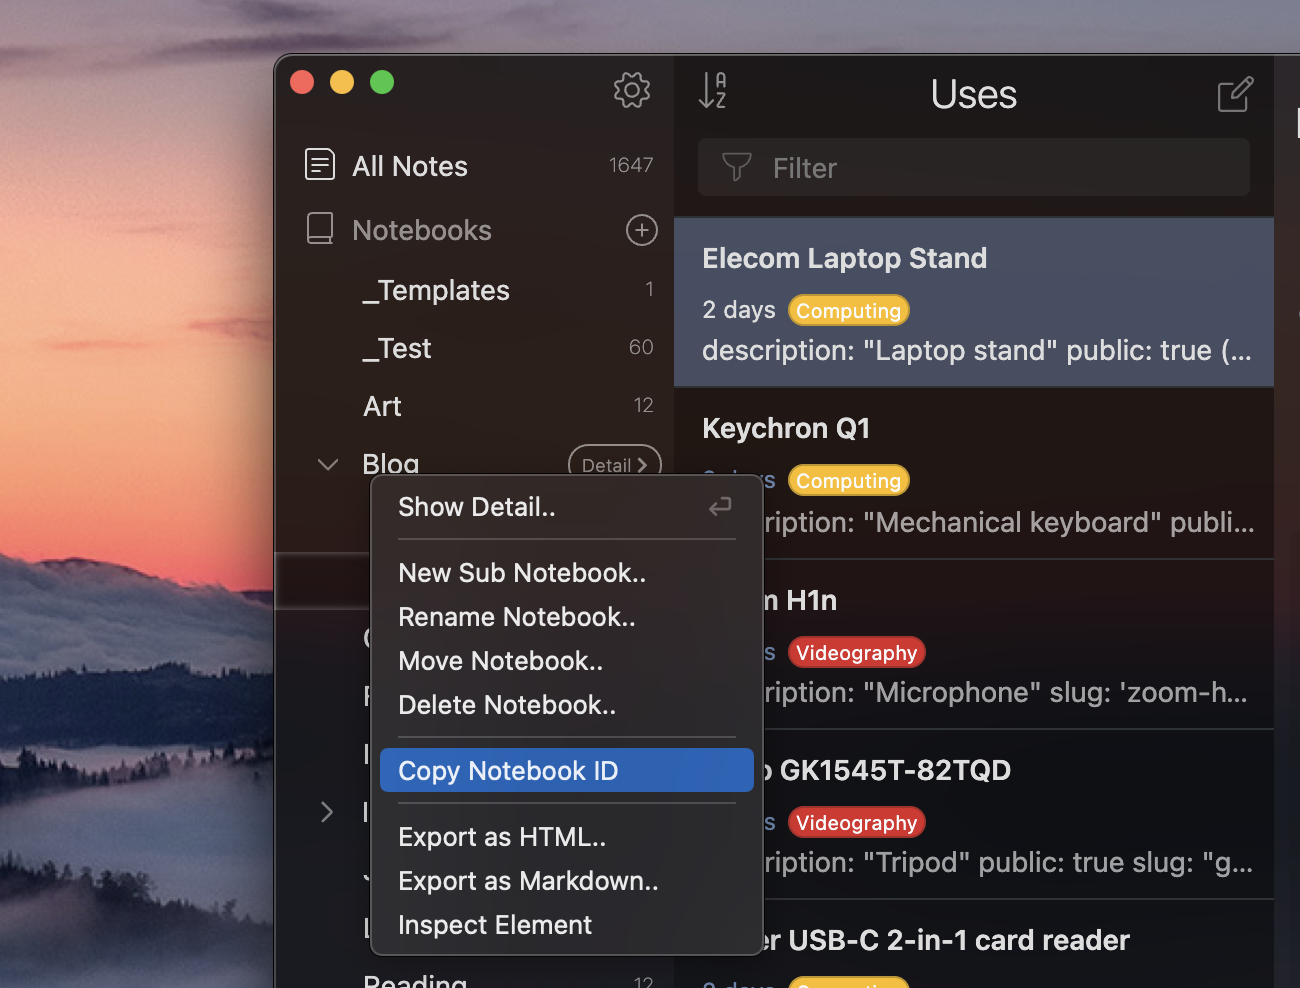
Here, you need an ID of the notebook that you want to export. To get the notebook ID easily, install the dev-tools plugin from Preferences → Plugins/Install.
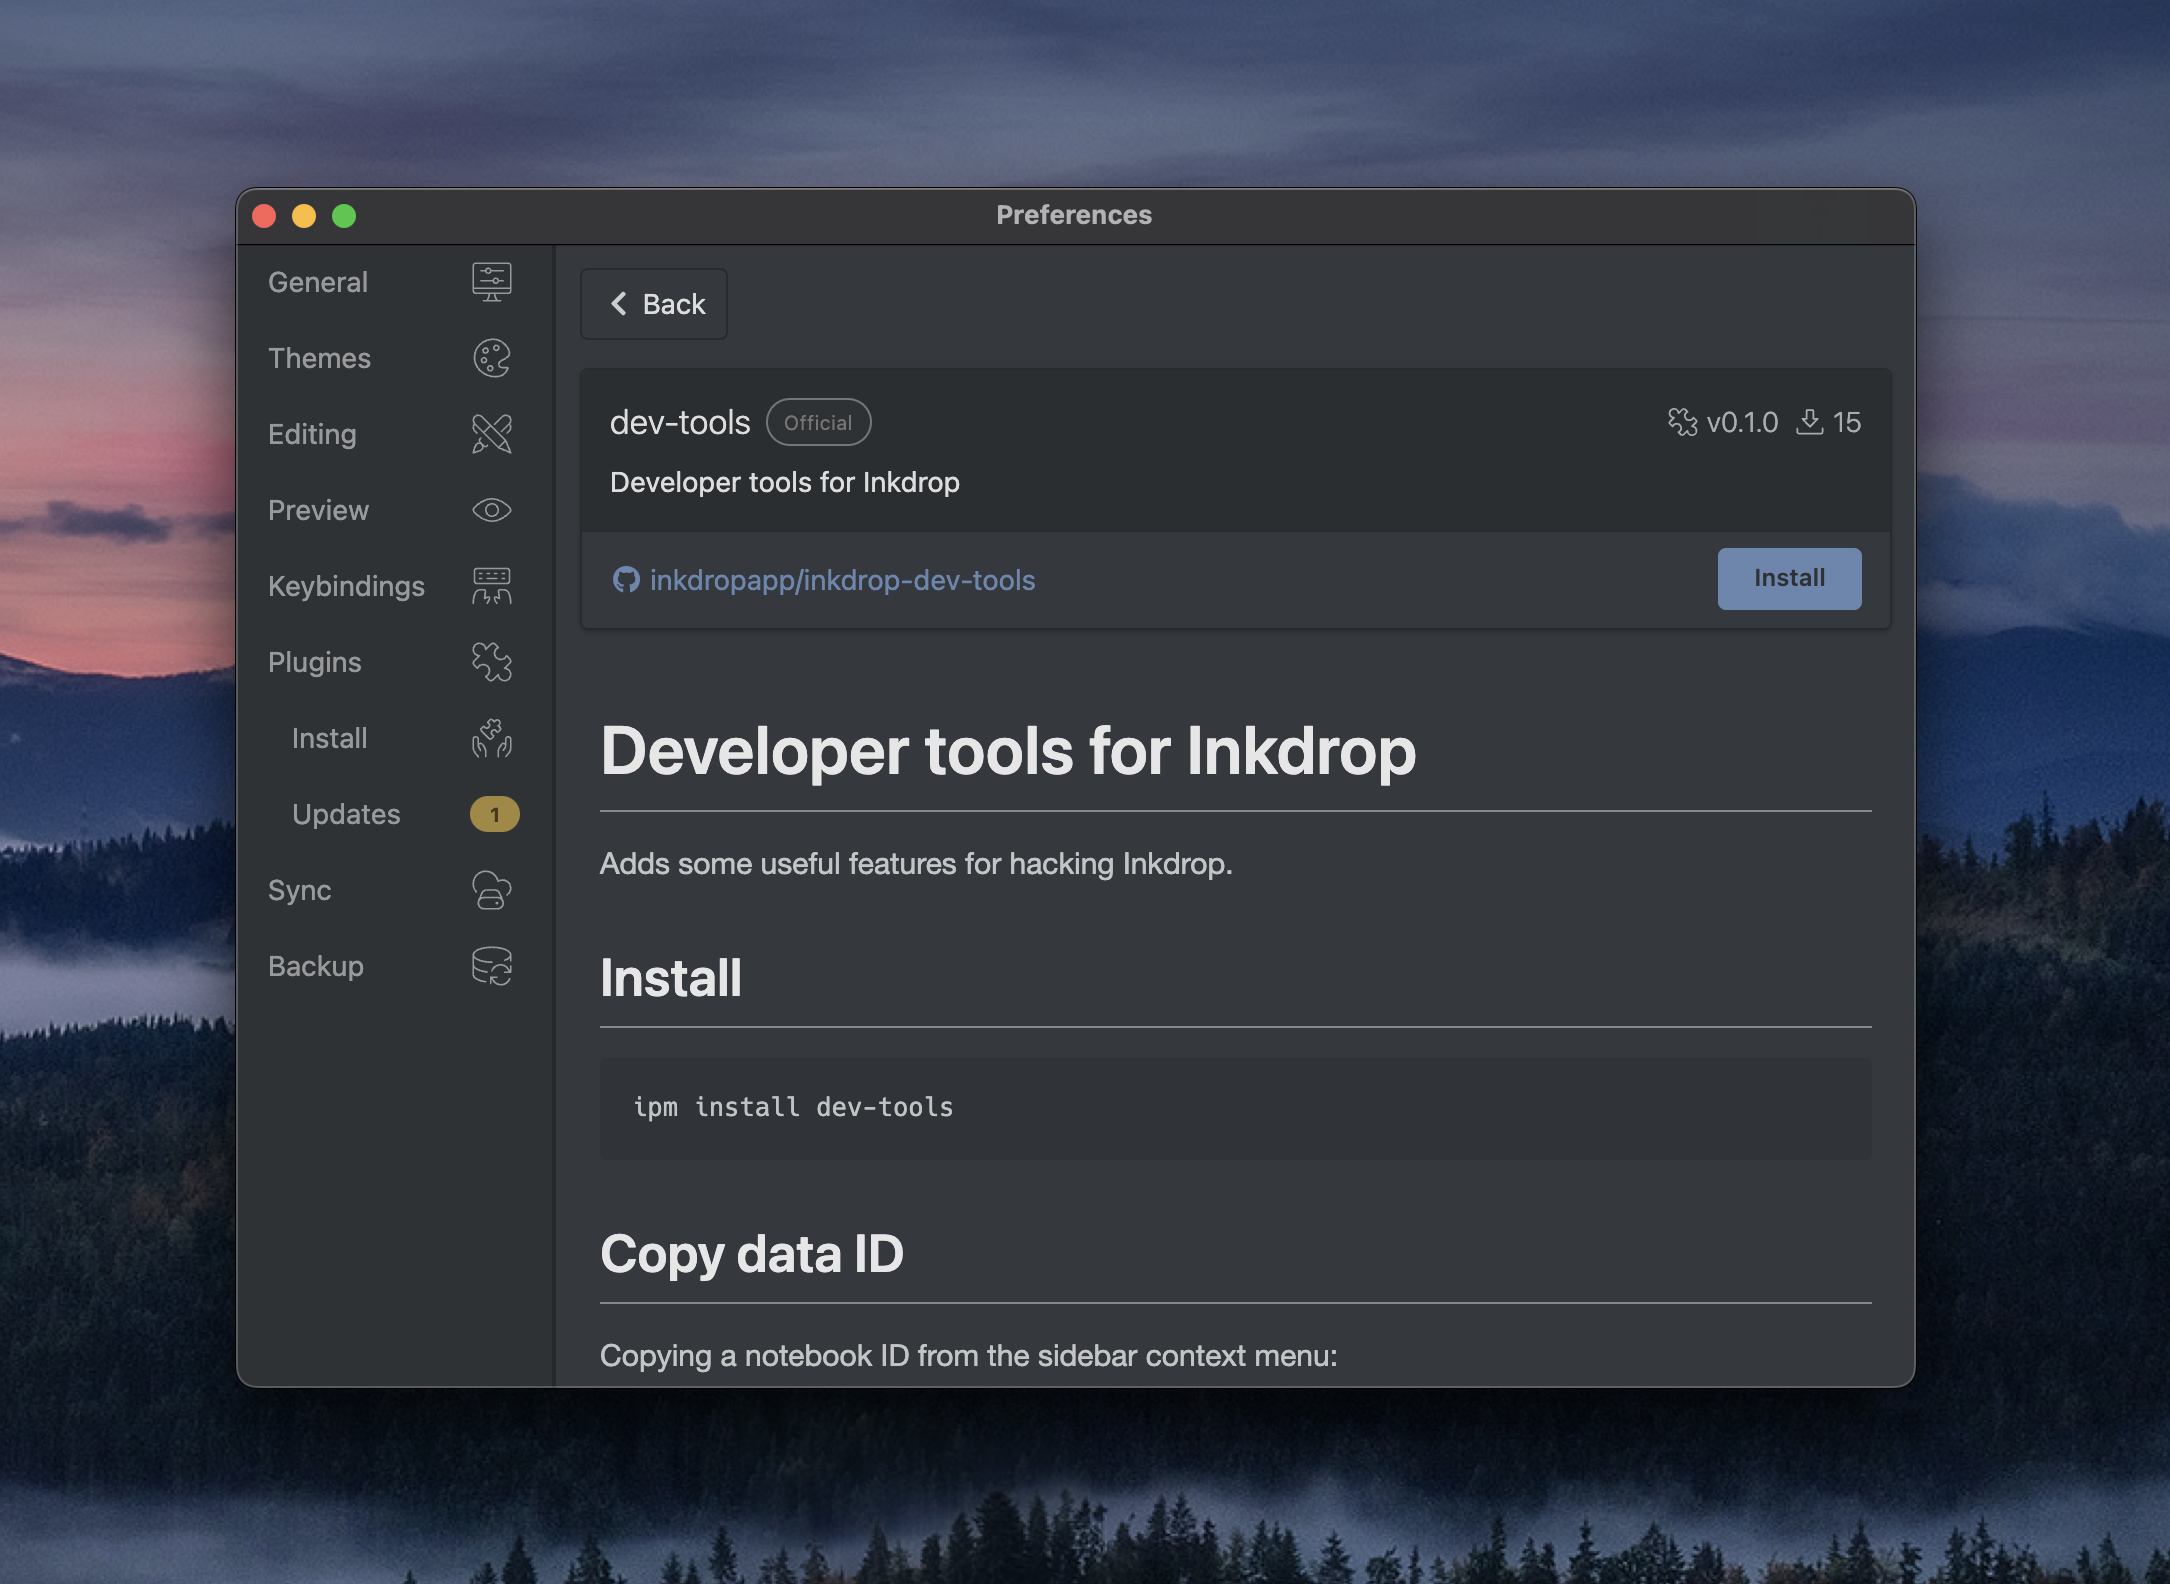
After installing it, you can quickly copy notebook IDs from the context menu like so:
Back to the .env file, paste the notebook ID. Now it should look like this:
DEBUG='inkdrop:export:info,inkdrop:export:error'
INKDROP_USERNAME='foo'
INKDROP_PASSWORD='bar'
INKDROP_PORT=19840
INKDROP_BOOKID='book:r8KUw7SBx'
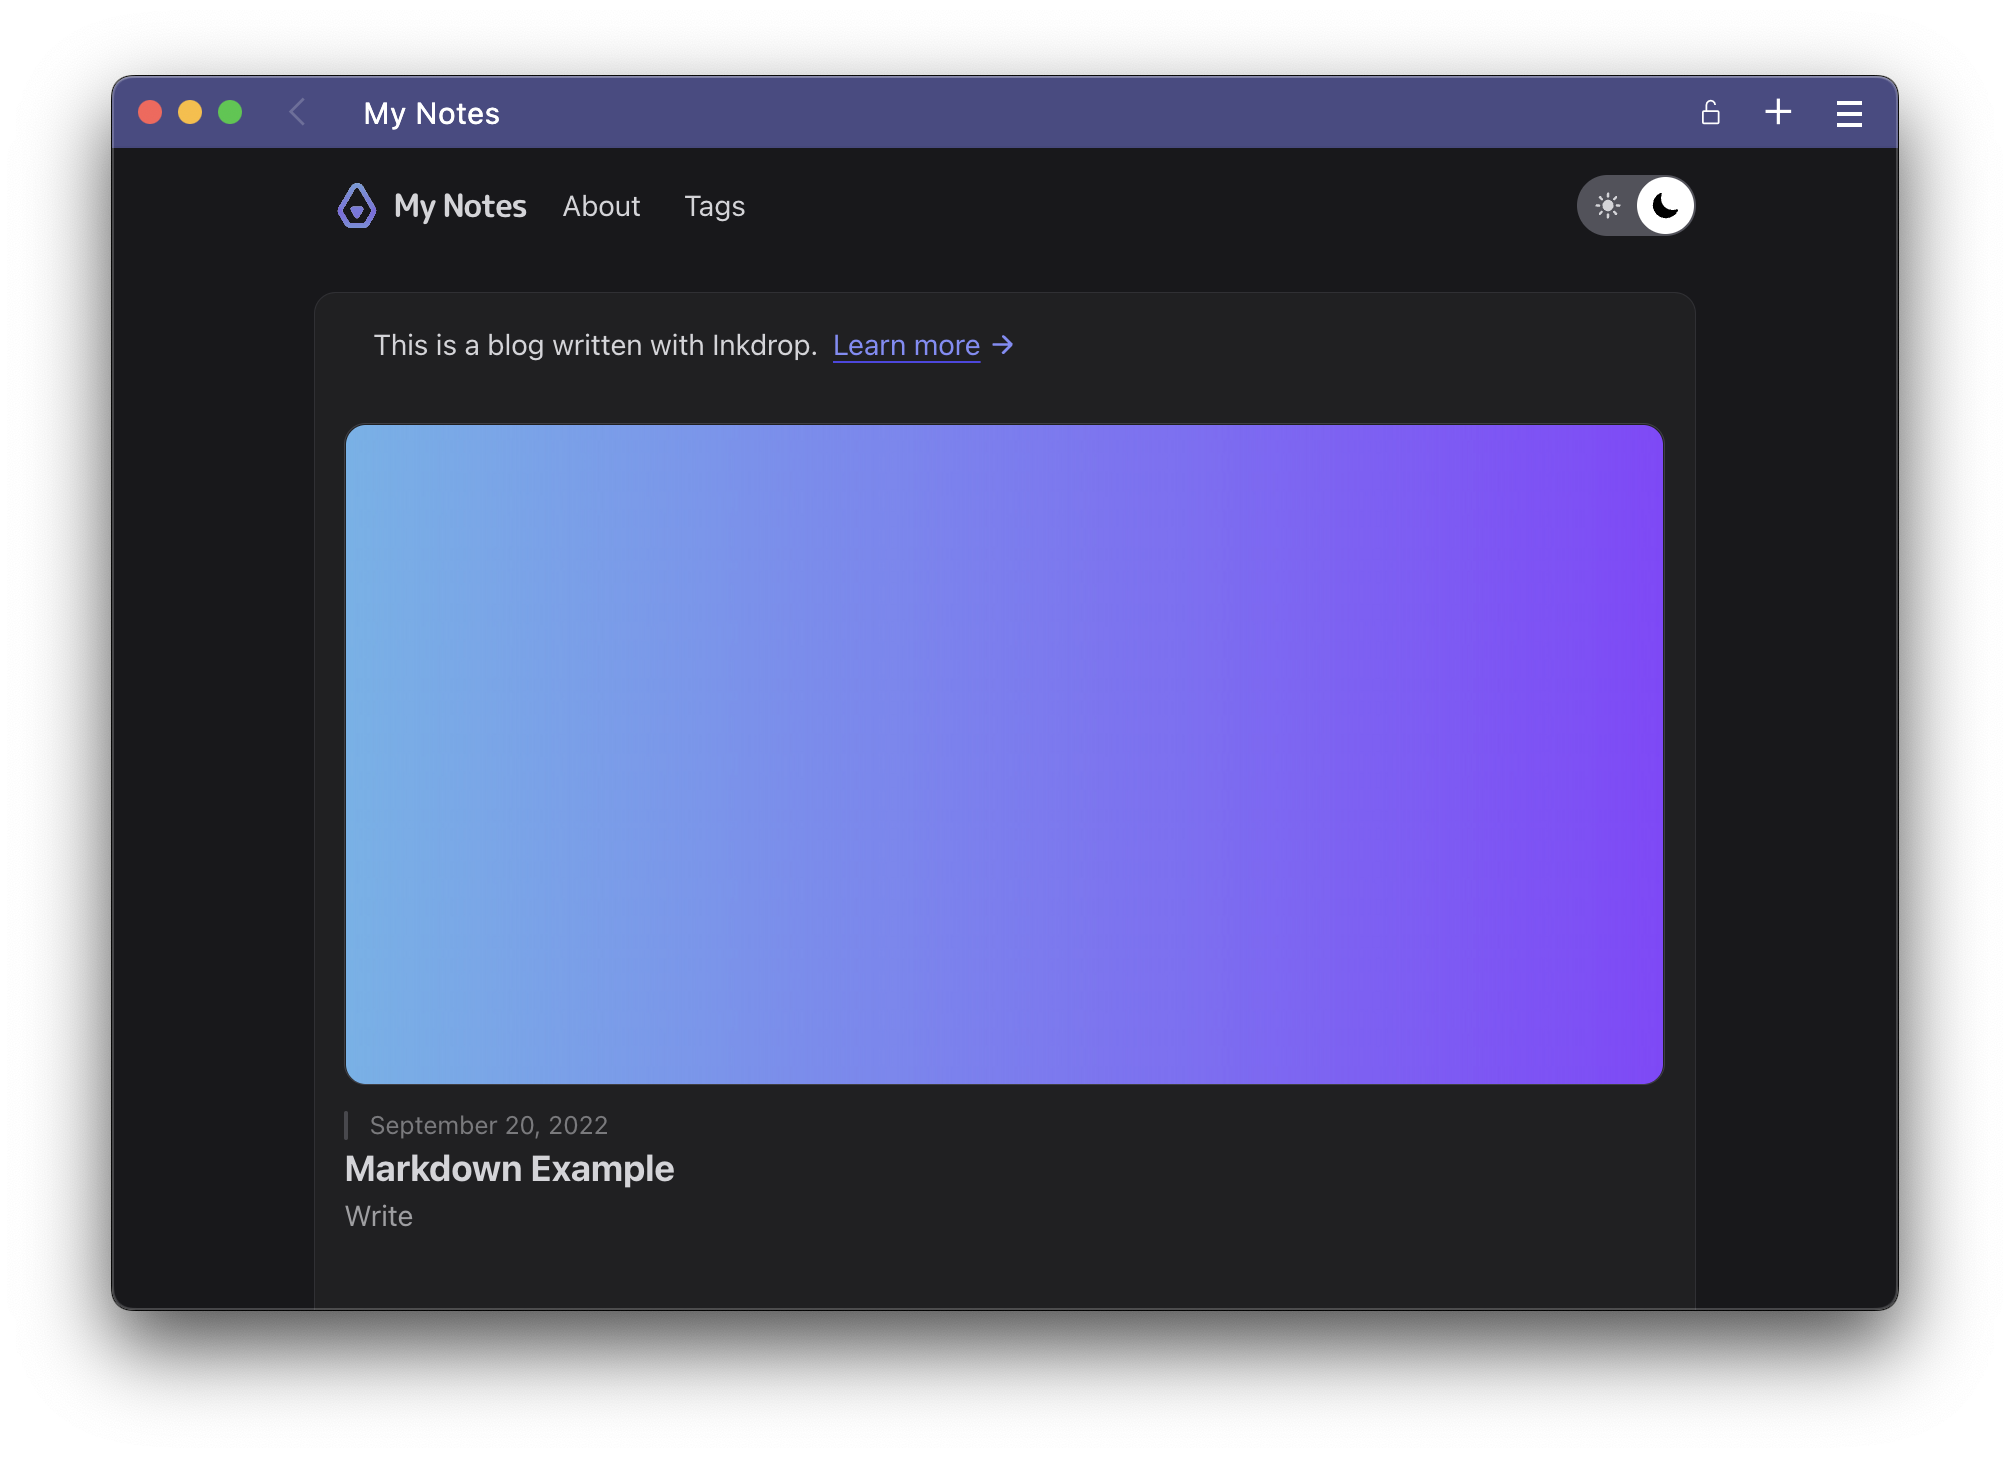
Okay, let's start the Astro dev server.
npm run start
You've got the blog running on http://localhost:3000/ like so:
Let's create a note in the notebook for the blog.
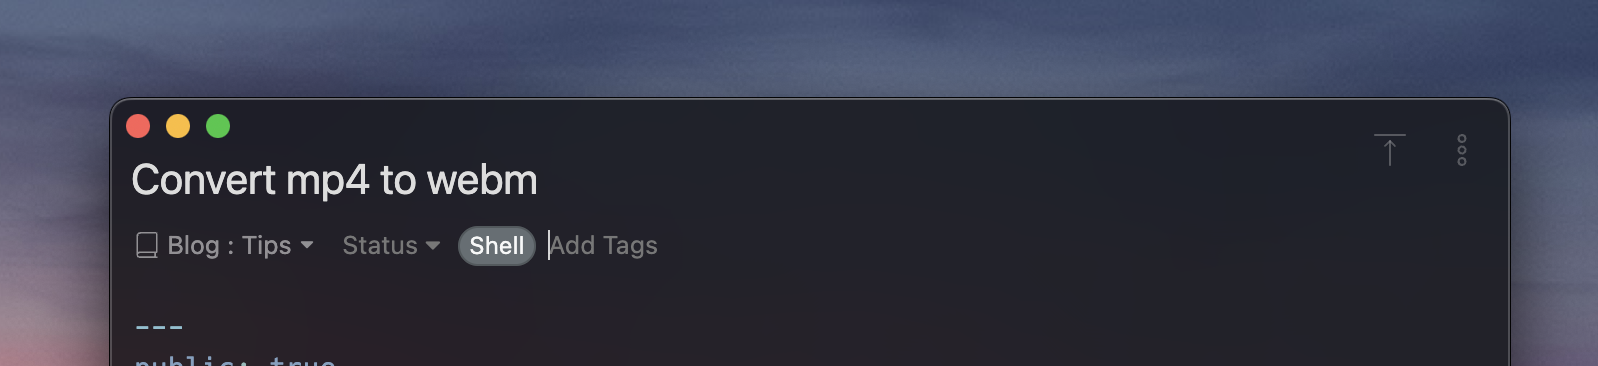
As you can see, the note starts with a fenced block called YAML frontmatter:
---
public: true
---
By specifying public: true here, it tells live-export that the note should be exported.
Let's run live-export in another terminal session:
npm run live-import
> inkdrop-blog-template@0.0.1 live-import
> node --experimental-vm-modules tools/import.mjs
(node:59628) ExperimentalWarning: The Fetch API is an experimental feature. This feature could change at any time
(Use `node --trace-warnings ...` to show where the warning was created)
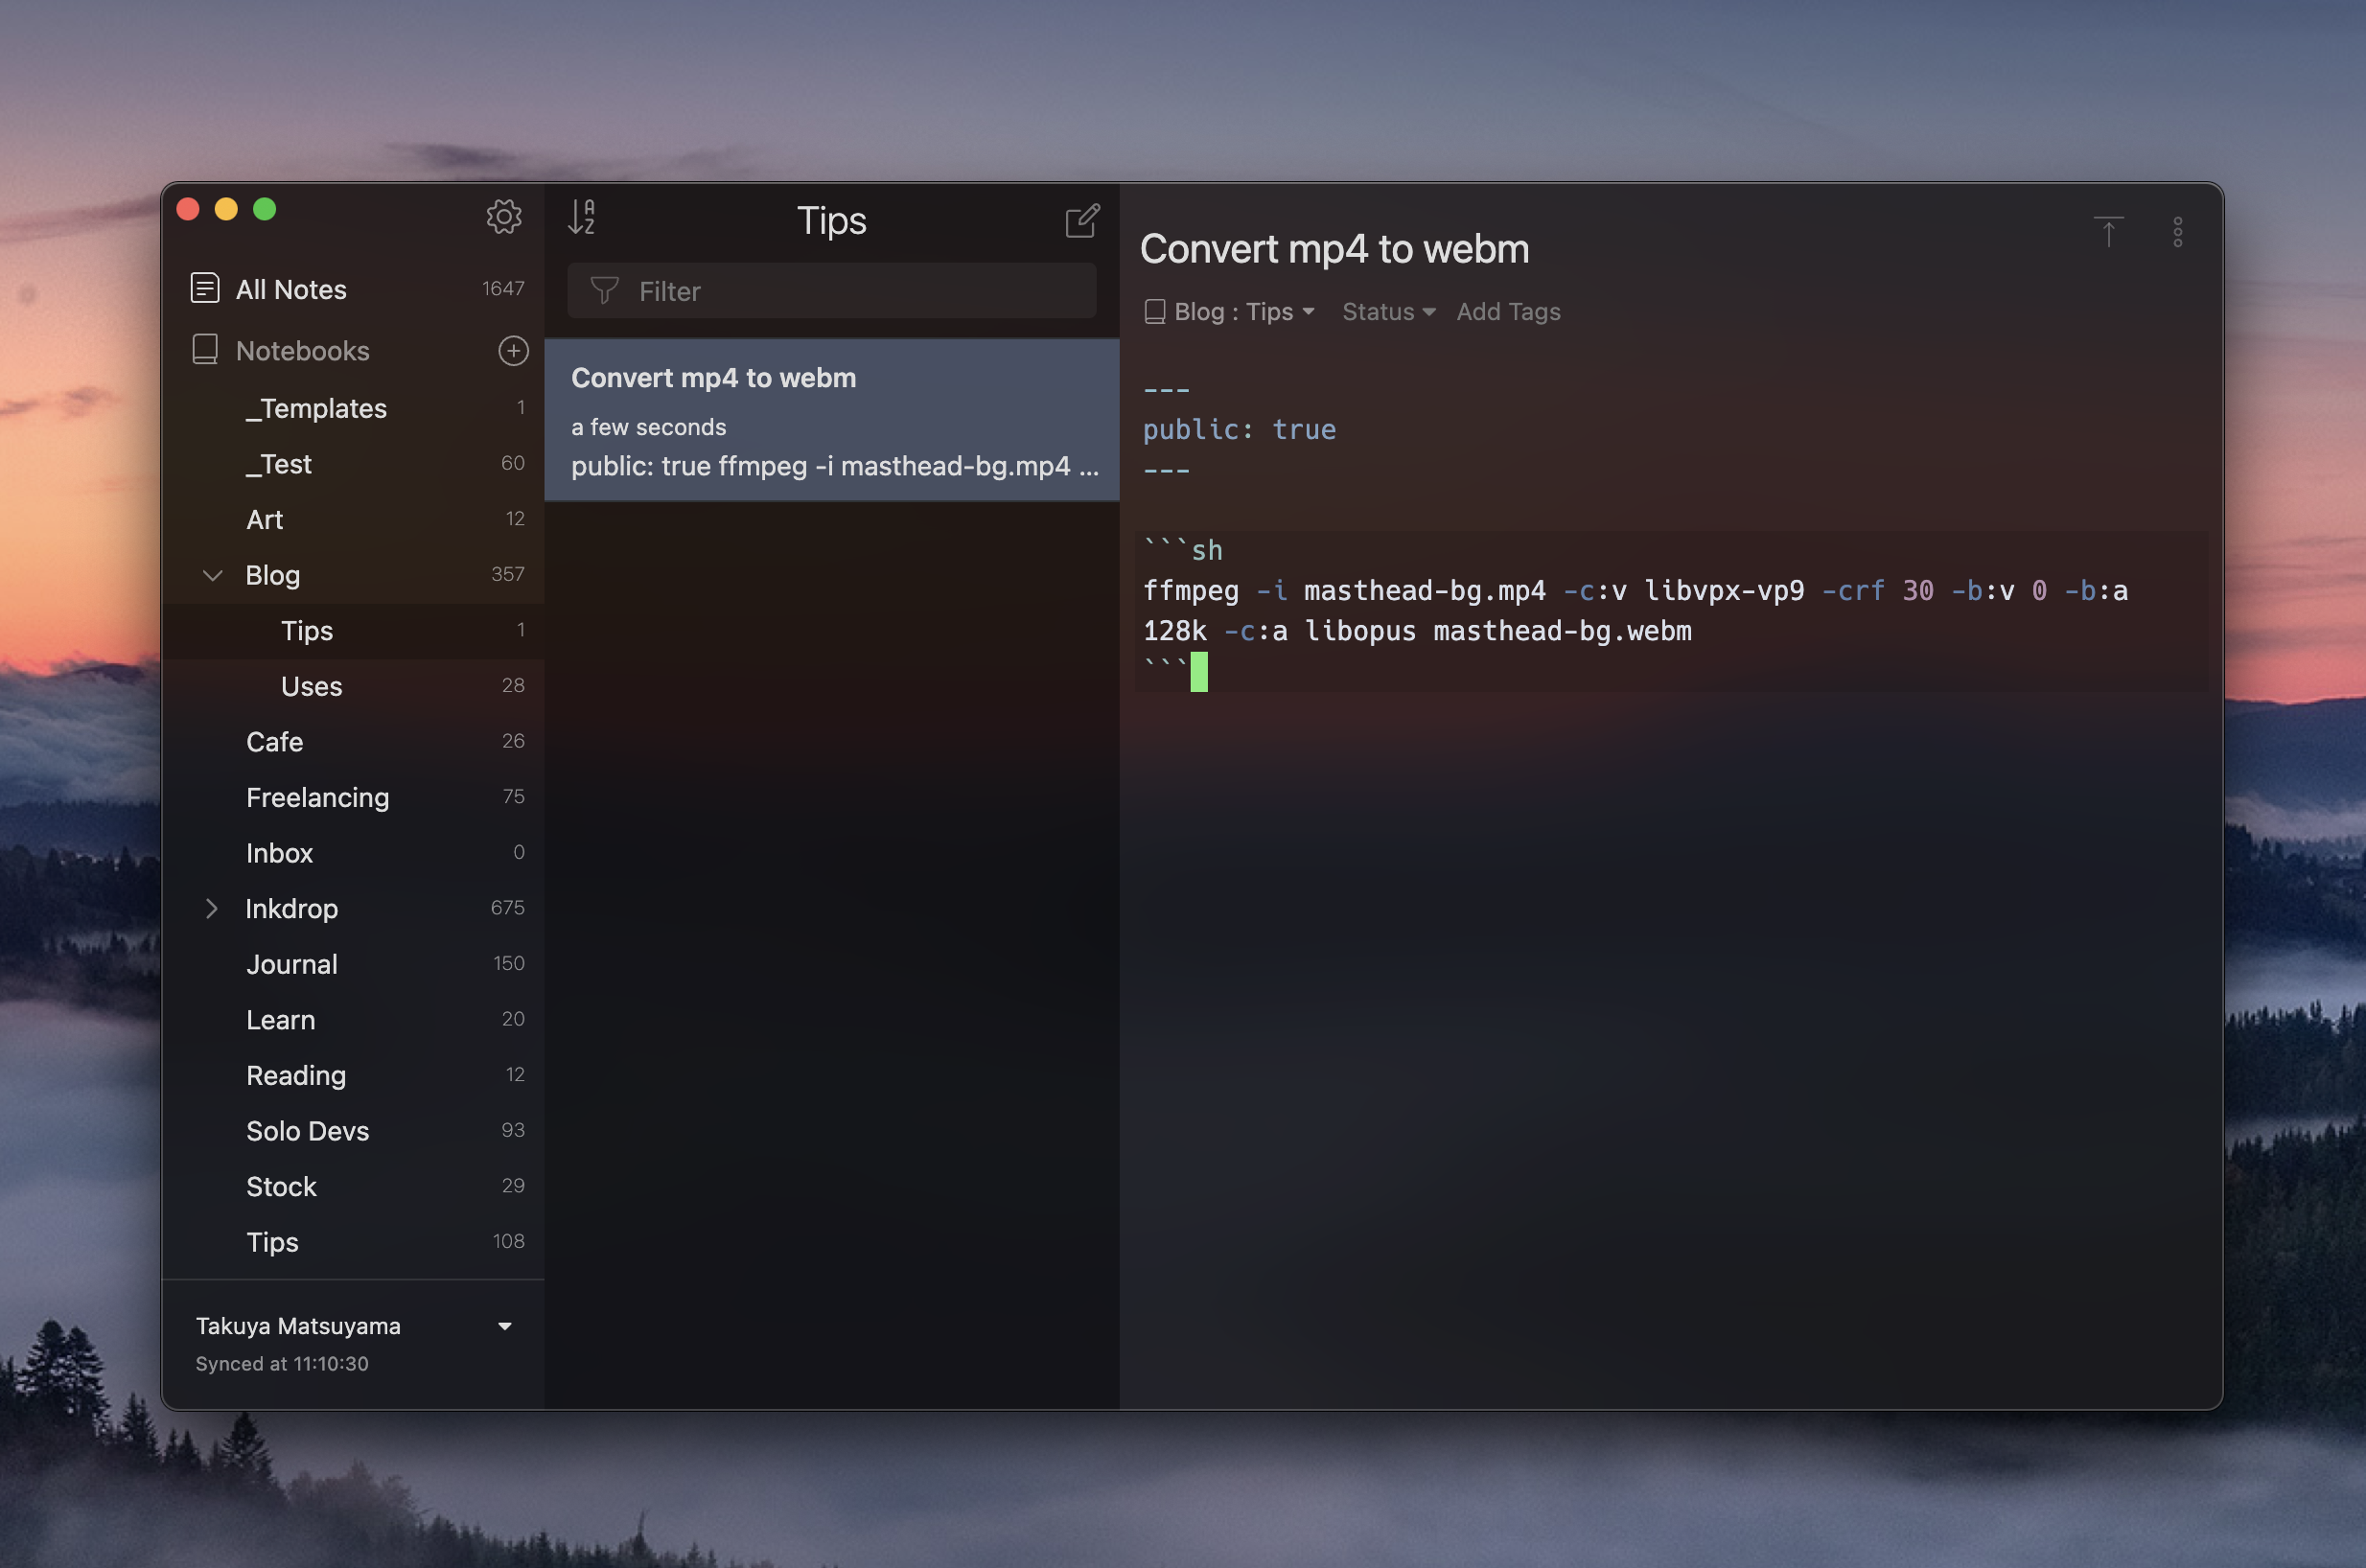
inkdrop:export:info Exporting note: note:_F3VsSEhJ Convert mp4 to webm +0ms
inkdrop:export:info Watching changes.. +6ms
You should see that the note has been exported and it is now watching changes. The blog looks like so:
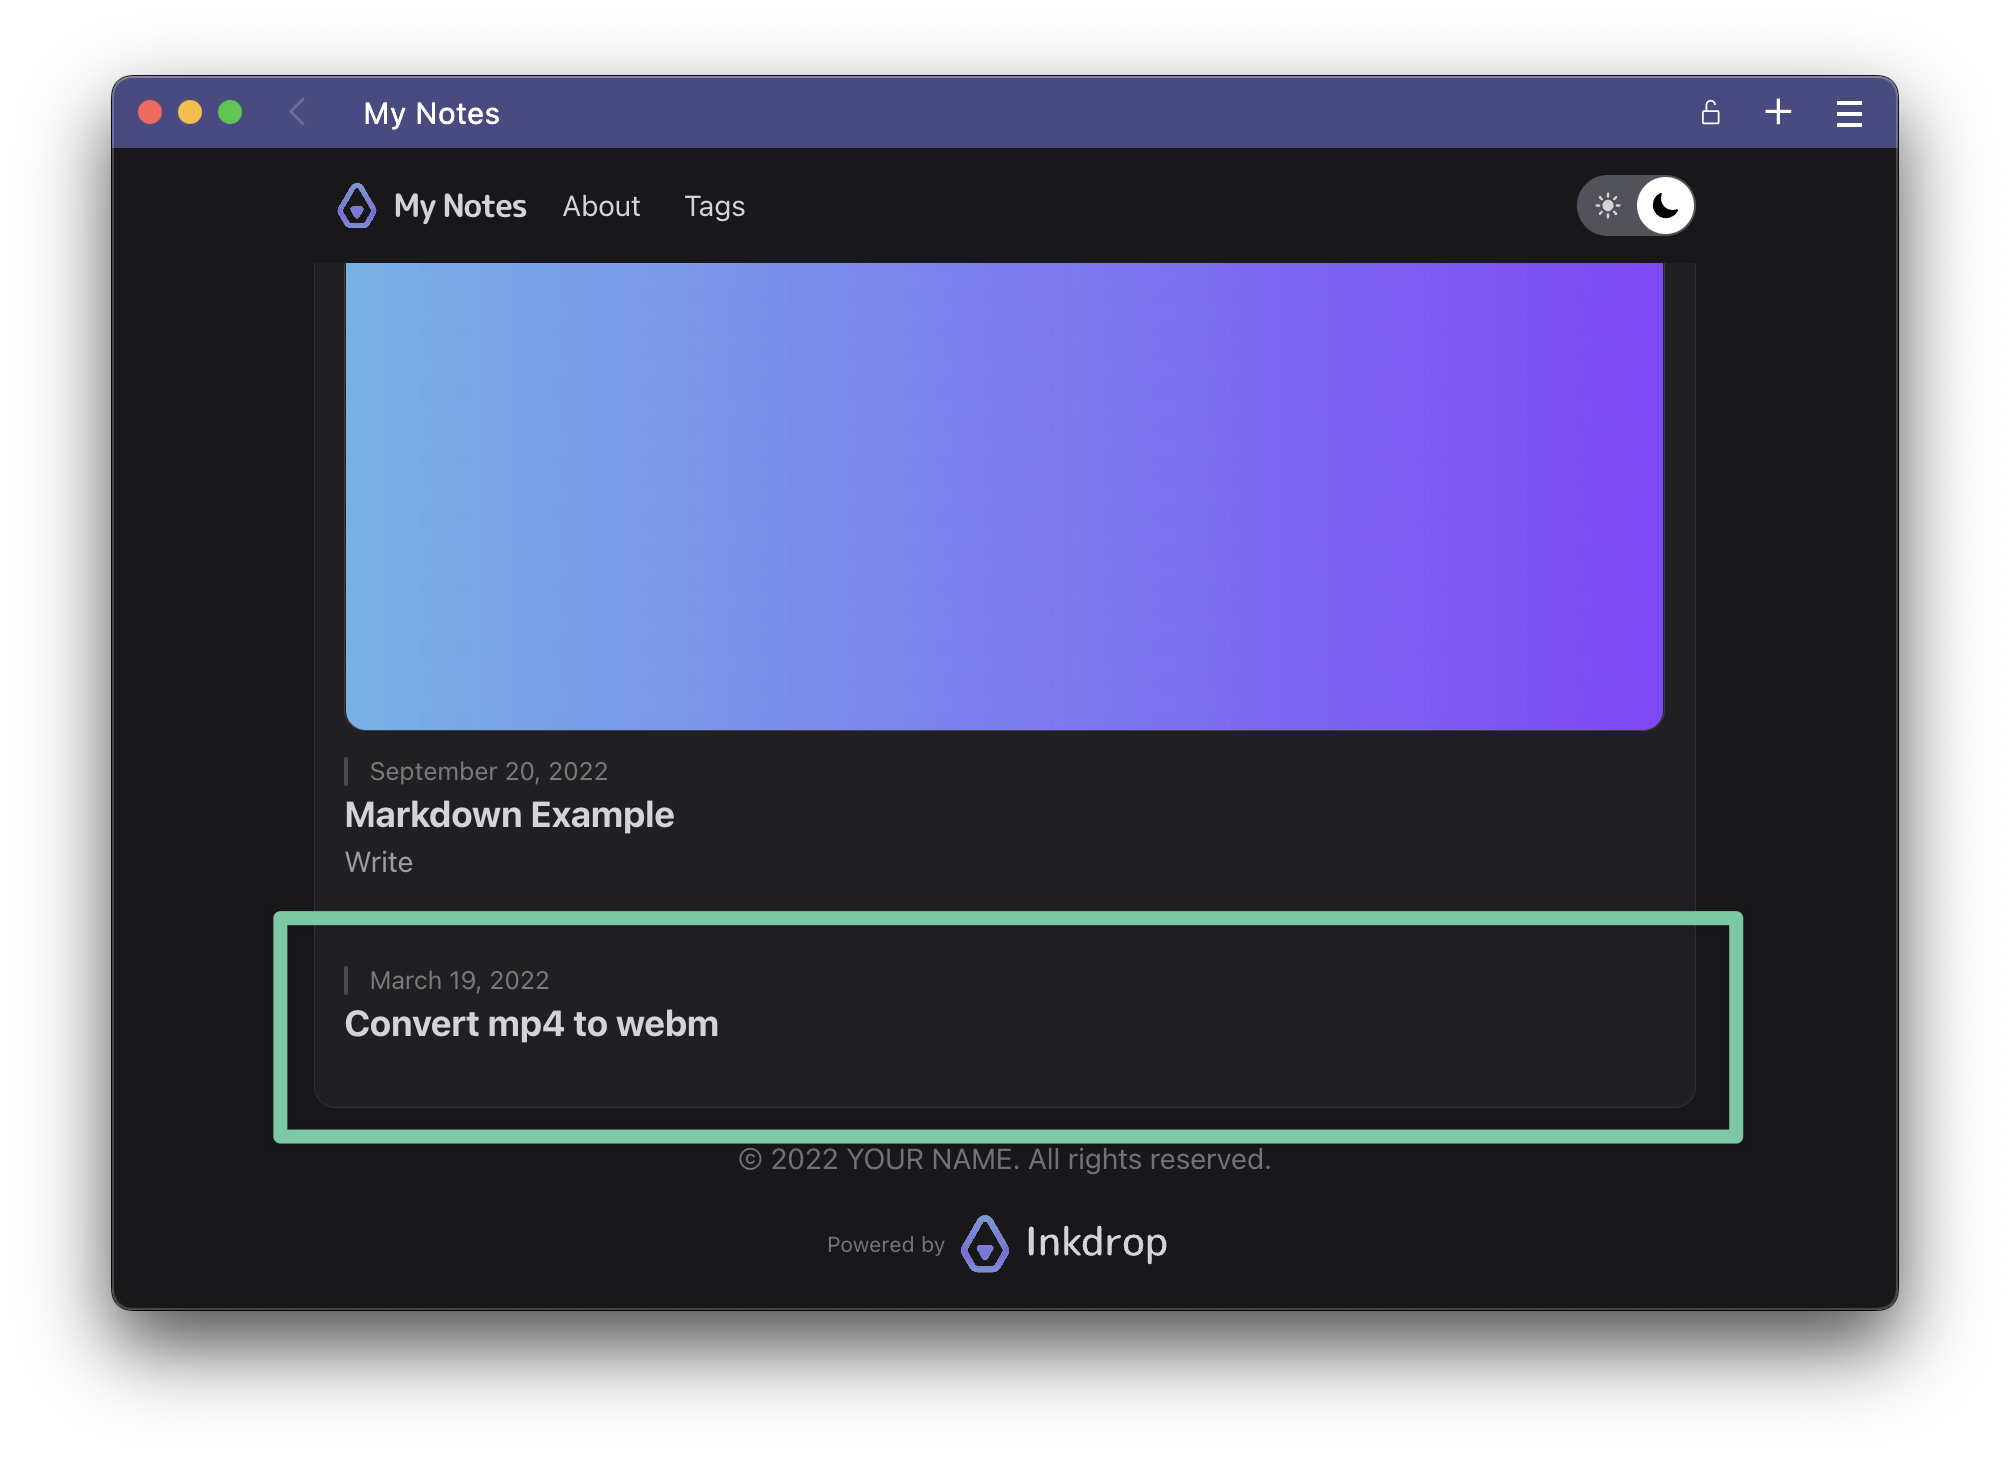 Click the post:
 As long as live-export runs, it immediately reflects on the blog as you make changes to the note in Inkdrop.
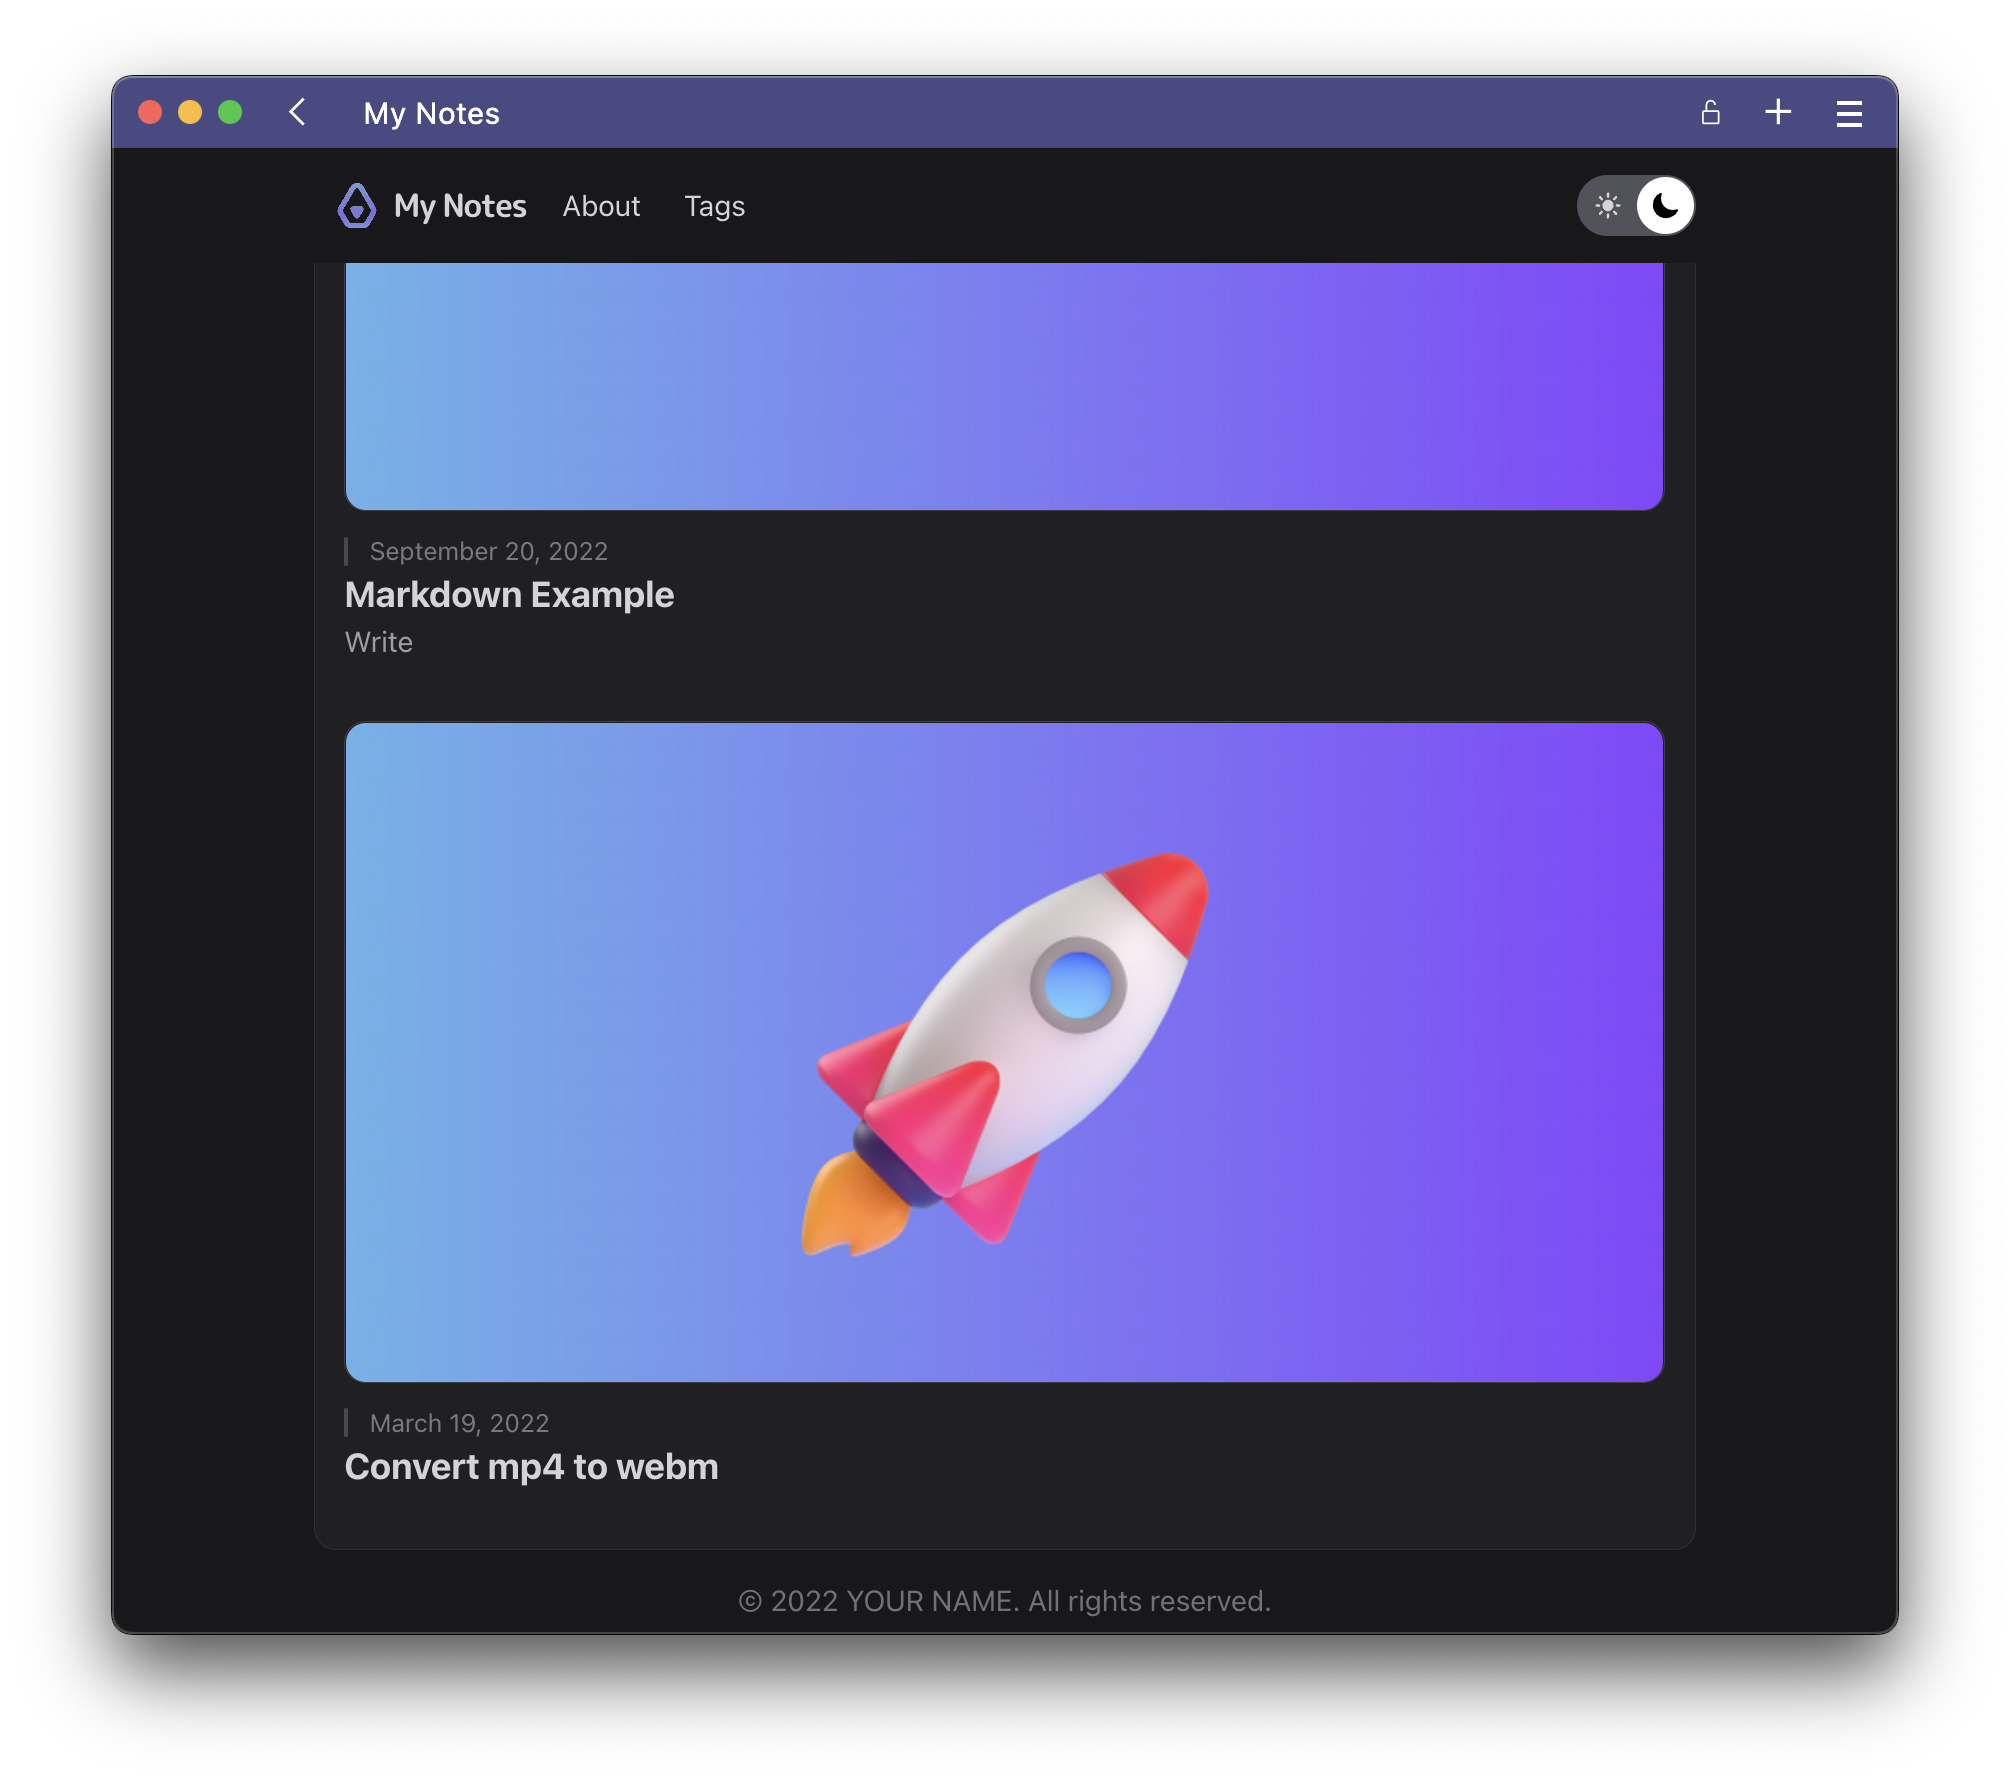
It supports images as well. Let's insert an image file into the note something like:
--- public: true ---

``` ffmpeg -i masthead-bg.mp4 -c:v libvpx-vp9 -crf 30 -b:v 0 -b:a 128k -c:a libopus masthead-bg.webm ```

It automatically exports the image into <PROJECT_ROOT>/public/posts/ folder.
But the image is not displayed on the index page yet.
Let's use it as a post thumbnail. Change the alt of the image to "thumbnail" like so:

Then, it got the thumbnail!
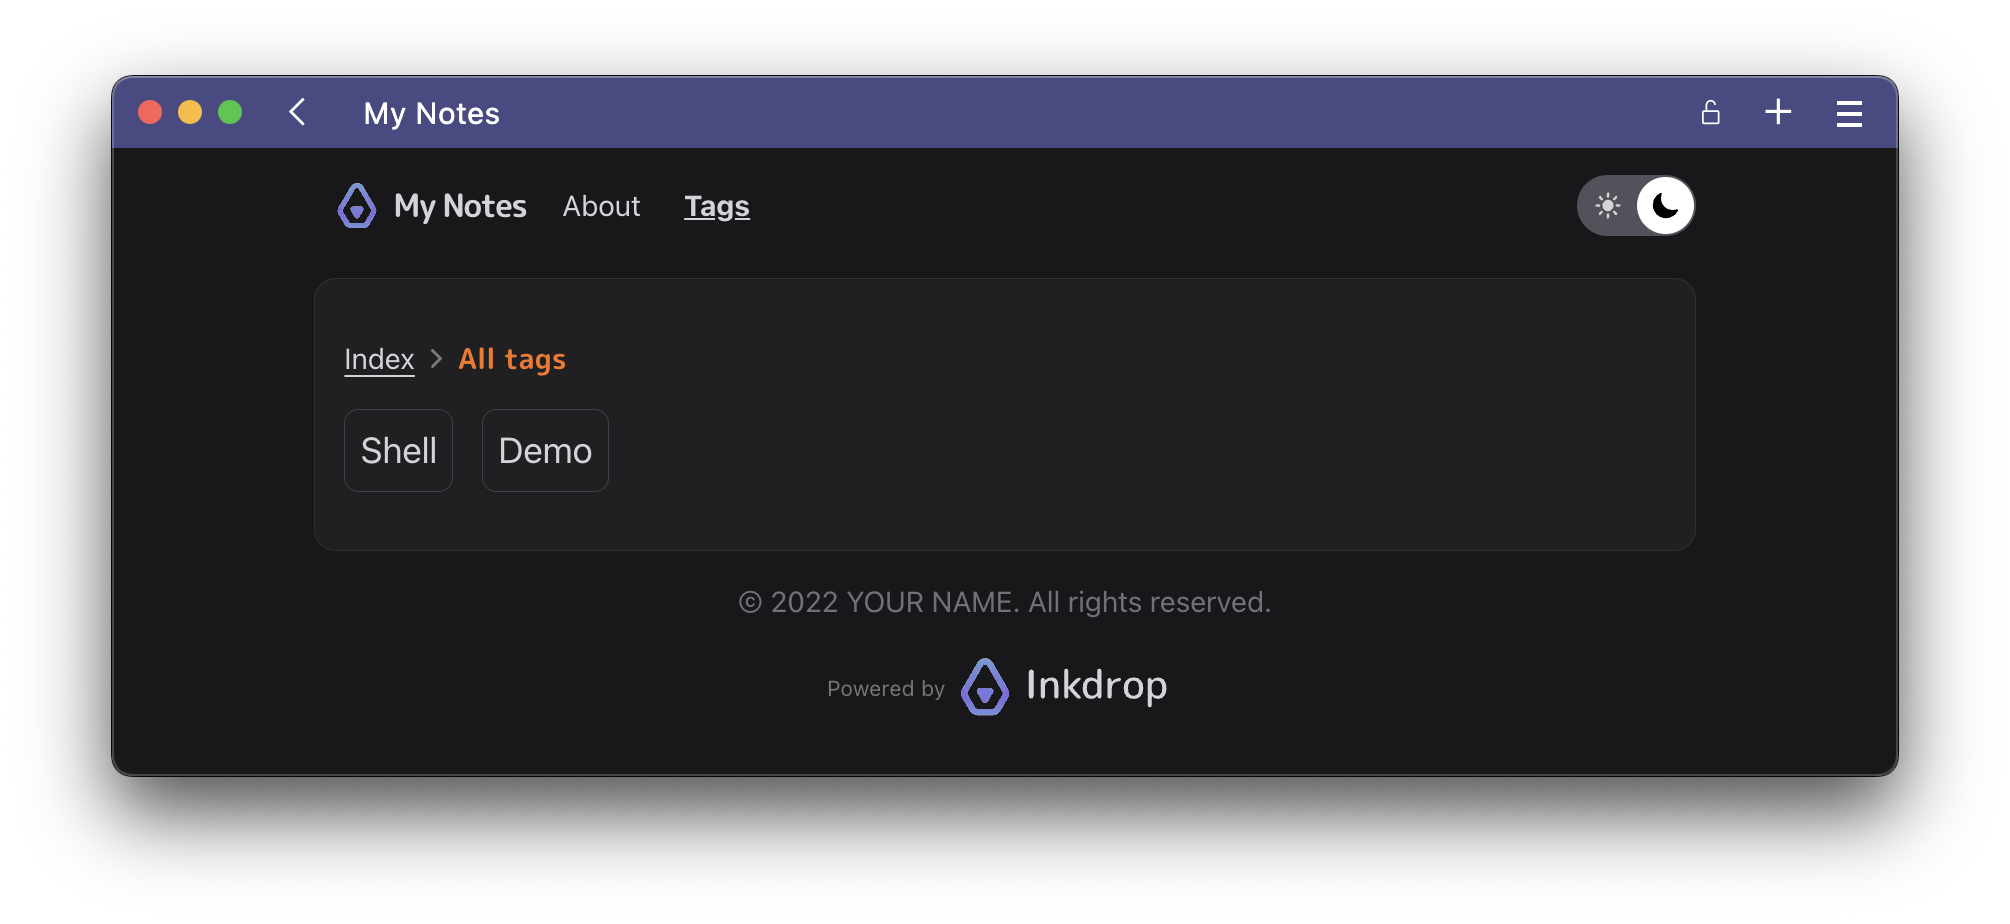
Next, let's add a tag to the note. The blog automatically detects tags specified in the frontmatters and generates pages for them.
 After adding a tag to the note, you should see there are the tags listed at
 http://localhost:3000/tags.
If you don't see tags, please try to re-run live-export.
Now, it's ready to write your blog posts. You can change the navbar logo, title, colors, and everything as you like. Enjoy!
FAQ
Where can I deploy my blog?
Check out the Astro documentation on deploying your astro site.
How can I see the access logs of the local server?
Run the app with a --enable-logging flag. See the documentation for more detail.
Can I import the notes back to Inkdrop?
No. As it transforms the notes for your projects, they are no longer compatible with Inkdrop.