New to Inkdrop
Get started

Welcome to Inkdrop!
On this page, you'll find all the necessary information to start crafting notes with Inkdrop.
There're 3 steps to take:
- Create an Inkdrop account.
- Download the app.
- Install the app on your device.
Let's get started.
Create Inkdrop account
First, you need to create an Inkdrop account. Your account serves many purposes and helps you to:
- Manage your personal information, including account credentials.
- Keep track of authenticated devices and IP addresses.
- Manage payments.
- Browse and publish plugins.
To create an account, go to the sign-up page.
Download the app
Once you've created an account, Inkdrop sends a verification link to the specified email. What you need to do:
- Go to the link to verify the account.
You're redirected to the Inkdrop website.
The link expires in 3 days. If it has expired, sign in to your account to have a new one sent. - Select Download the client app.
- Select an installer appropriate for your operating system and CPU architecture.
The download will start.
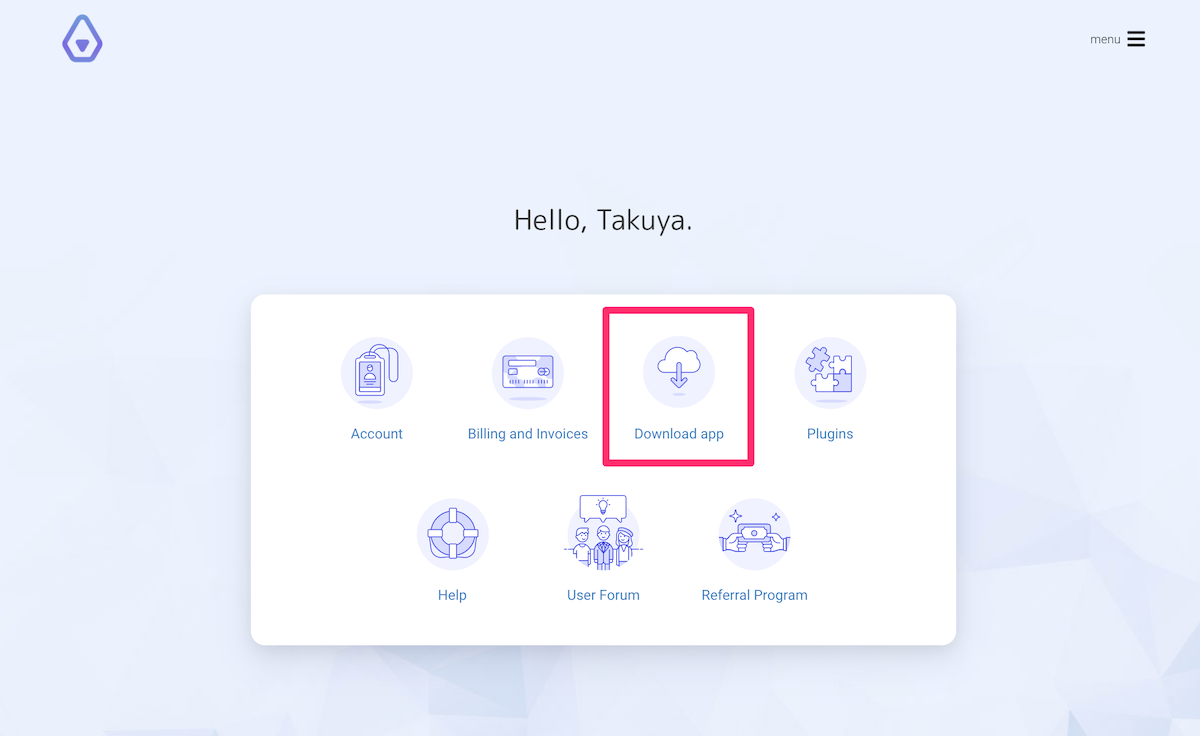
Alternatively, you can sign in to your Inkdrop account and select Download app as shown in the image below:
Then select an installer appropriate for your operating system.
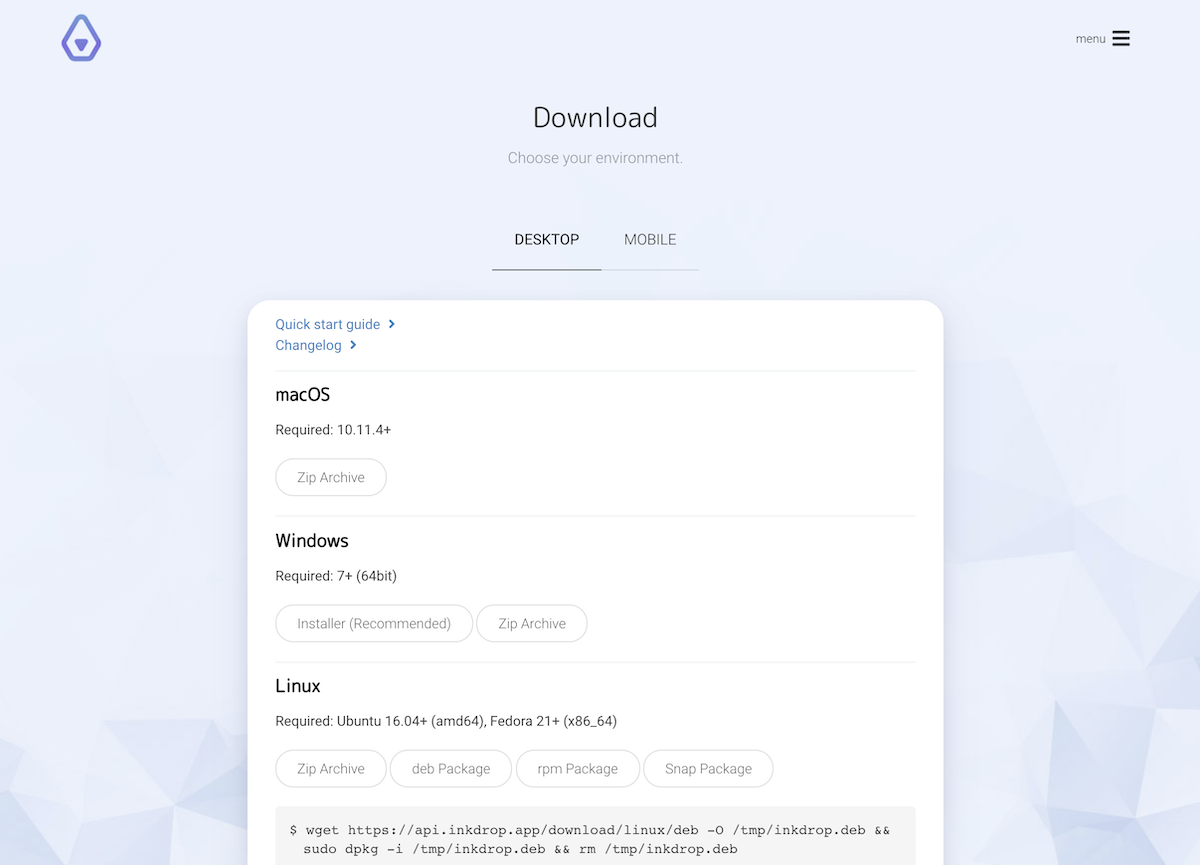
The following builds are available:
| Platform | Architectures | Formats |
|---|---|---|
| macOS | Apple Silicon (arm64), Intel (x64) | .dmg, .zip |
| Windows | x64, arm64 | Installer (.exe), .zip |
| Linux | x64 (amd64/x86_64), arm64 (aarch64) | AppImage, Snap (amd64 only), .deb, .zip |
Files are named like inkdrop-<version>-<arch>-<platform>.<ext>, for example inkdrop-6.0.0-arm64-mac.dmg.
Install Inkdrop
macOS
Download the .dmg file for your Mac. Pick arm64 for Apple Silicon (M-series) Macs and x64 for Intel Macs.
- Double-click the downloaded
inkdrop-x.y.z-<arch>-mac.dmgfile to open it. - Drag the Inkdrop application into your Applications folder.
If you downloaded the .zip file instead, double-click it to extract the application and then move it into your Applications folder.
via Homebrew (optional)
Inkdrop is also available as a Homebrew cask:
brew install --cask inkdrop
The Homebrew cask is maintained by the community, so it may lag behind the latest release.
Windows
Installer or zip archive
There're 2 options for Windows users: installer and zip archive. Prefer the installer as it automatically updates the app once new versions are released.
Once you've downloaded the inkdrop-x.y.z-<arch>-windows.exe file, double-click it and follow the installation instructions. Pick arm64 for Windows on ARM devices and x64 otherwise.
Linux
You can install Inkdrop on Linux via an AppImage, Snap, a Debian package, or a zip archive. Each format is available for both x64 and arm64, except Snap, which is available for amd64 only. Inkdrop is also available on Flathub.
Snap
If you don't have snapd yet, please install it beforehand.
The app is available in Snap Store. To install Inkdrop using snap, run the following command in the terminal:
sudo snap install inkdrop
# Allow the app to access your keyring
sudo snap connect inkdrop:password-manager-service
You can easily update the app by running the command below:
sudo snap refresh inkdrop
Debian, Ubuntu, or related systems
Download the .deb package (amd64 or arm64) and install it:
sudo apt install ./inkdrop-x.y.z-amd64-linux.deb
apt installs any missing dependencies automatically.
AppImage
AppImage runs on most distributions without installation. Make the file executable and run it:
chmod +x inkdrop-x.y.z-x86_64-linux.AppImage
./inkdrop-x.y.z-x86_64-linux.AppImage
Version 6.3.1 and earlier need FUSE 2
If the AppImage exits with dlopen(): error loading libfuse.so.2, your distribution doesn't have FUSE 2 installed. Do one of the following:
- Install FUSE 2:
fuse2on Arch,libfuse2t64on Ubuntu 24.04 or later,libfuse2on Debian and older Ubuntu. - Run it without FUSE:
APPIMAGE_EXTRACT_AND_RUN=1 ./inkdrop-x.y.z-x86_64-linux.AppImage - Use the zip archive instead.
Later versions don't need FUSE 2.
The AppImage doesn't add Inkdrop to your app launcher. See Add Inkdrop to your app launcher.
Flatpak
If you don't have Flatpak yet, please set it up beforehand.
The app is available on Flathub. To install it, run the following command in the terminal:
flatpak install flathub app.inkdrop.Inkdrop
You can update the app by running the command below:
flatpak update app.inkdrop.Inkdrop
Zip archive
Extract the zip archive anywhere you like and run the inkdrop executable inside it.
The zip archive doesn't add Inkdrop to your app launcher. See Add Inkdrop to your app launcher.
Add Inkdrop to your app launcher
Snap, Flatpak, and the .deb package add a launcher entry, an icon, and the inkdrop:// link handler for you. The AppImage and the zip archive don't install anything, so links such as inkdrop://note/... won't open the app until you add a desktop entry.
For the AppImage, a tool such as Gear Lever or AppImageLauncher can do this for you. To do it by hand:
Get the icon.
Zip archive: it is
app.inkdrop.Inkdrop.pngin the extracted folder.AppImage: extract it with the command below. It is saved in
squashfs-root/usr/share/icons/hicolor/256x256/apps/../inkdrop-x.y.z-x86_64-linux.AppImage --appimage-extract usr/share/icons/hicolor/256x256/apps/inkdrop.png
Create
~/.local/share/applications/inkdrop.desktopwith the following content. SetExecto the full path of the AppImage or theinkdropexecutable, andIconto the full path of the icon:[Desktop Entry] Type=Application Name=Inkdrop GenericName=Markdown Notes Comment=Markdown note-taking app Exec=/full/path/to/inkdrop %U Icon=/full/path/to/inkdrop.png Terminal=false StartupWMClass=inkdrop Categories=Office;Utility;TextEditor; MimeType=x-scheme-handler/inkdrop;Register the entry and the
inkdrop://link handler:update-desktop-database ~/.local/share/applications xdg-mime default inkdrop.desktop x-scheme-handler/inkdrop
Update Exec when you move the app or download a new AppImage under a different file name.
Add custom Electron flags
If the app doesn't start properly, you can add custom flags for your operating system. To try a flag once, pass it on the command line:
inkdrop --ozone-platform=wayland
To keep it, add it to the Exec line of the desktop entry. Where the entry is depends on how you installed the app:
.debpackage:/usr/share/applications/inkdrop.desktop. Copy it to~/.local/share/applications/and edit the copy, because an update replaces the original.- AppImage or zip archive: the entry you created in Add Inkdrop to your app launcher.
[Desktop Entry]
Name=Inkdrop
Exec=/opt/Inkdrop/inkdrop %U        # Edit this line
Terminal=false
Type=Application
Icon=inkdrop
StartupWMClass=inkdrop
Comment=Markdown note-taking app
MimeType=x-scheme-handler/inkdrop;
Categories=Utility;
For Wayland users, add the following flags to the Exec field like so:
Exec=/opt/Inkdrop/inkdrop --enable-features=UseOzonePlatform --ozone-platform=wayland --enable-wayland-ime %U
Sign in to your account
Once you've installed Inkdrop, sign in to your account. To do that:
- Open the app. You'll see a login screen.
- Enter your email address and password, and select Log in.
- If you've enabled two-factor authentication, enter the 6-digit code from your authenticator app and select Verify.
Now, you are ready to start using Inkdrop!
Get help