New to Inkdrop
How to organize your notes
Now that you understand how to create notes using Markdown in Inkdrop, let's move on to the next step: organizing your notes efficiently. Inkdrop makes this process easier with features like notebooks, statuses, and tags, allowing you to focus on capturing and developing your ideas while keeping track of your tasks.
Sidebar: A note organization portal
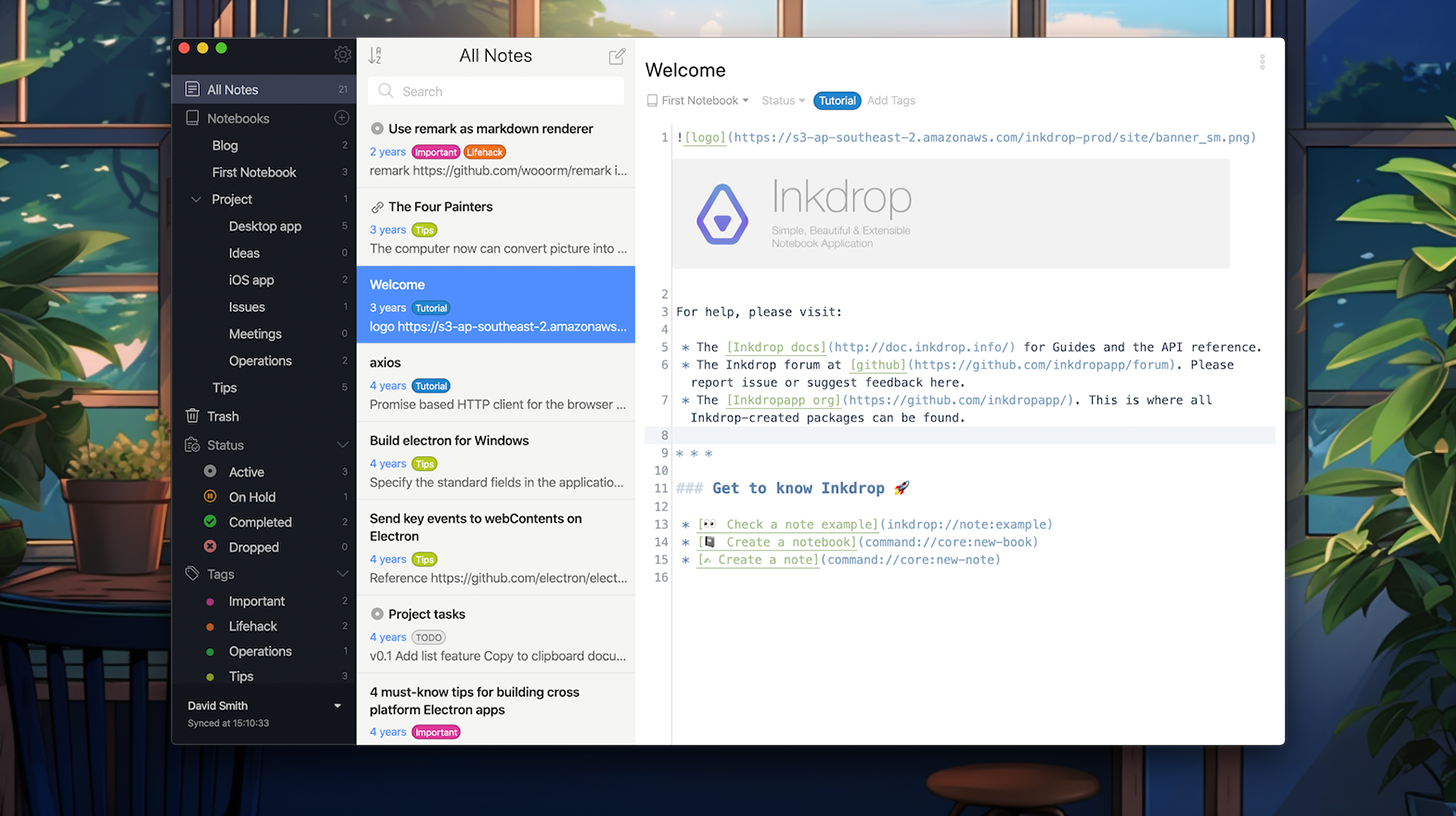
The sidebar is the leftmost section of the app. It is more than just a section of the app; it's where all your organizational tools are located. Inkdrop provides three ways to organize your notes:
- Notebooks are like folders that store your notes. You can nest notebooks in one another as deeply as needed.
- Statuses help you treat notes as tasks and, for example, display only active or completed ones.
- Tags are like labels that let you link notes with one another. For example, if they relate to a common topic.
Press Command+/ or Ctrl+/ to toggle the sidebar.
Notebooks
One of the ways to think about notebooks is like separate projects. Every notebook covers a specific topic and can be divided into sub-notebooks.
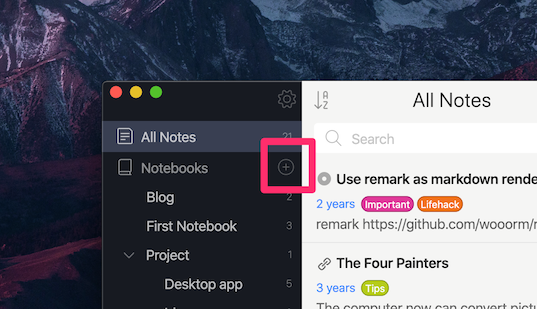
Add a notebook
To create a new notebook, click the icon next to the Notebooks title:
To create a sub notebook:
- Right-click the notebook, which will be the parent, and select New Sub Notebook...
- Provide a title for the nested notebook.
- Click Create.
The newly created notebook will appear inside the parent one.
Move notes into a notebook
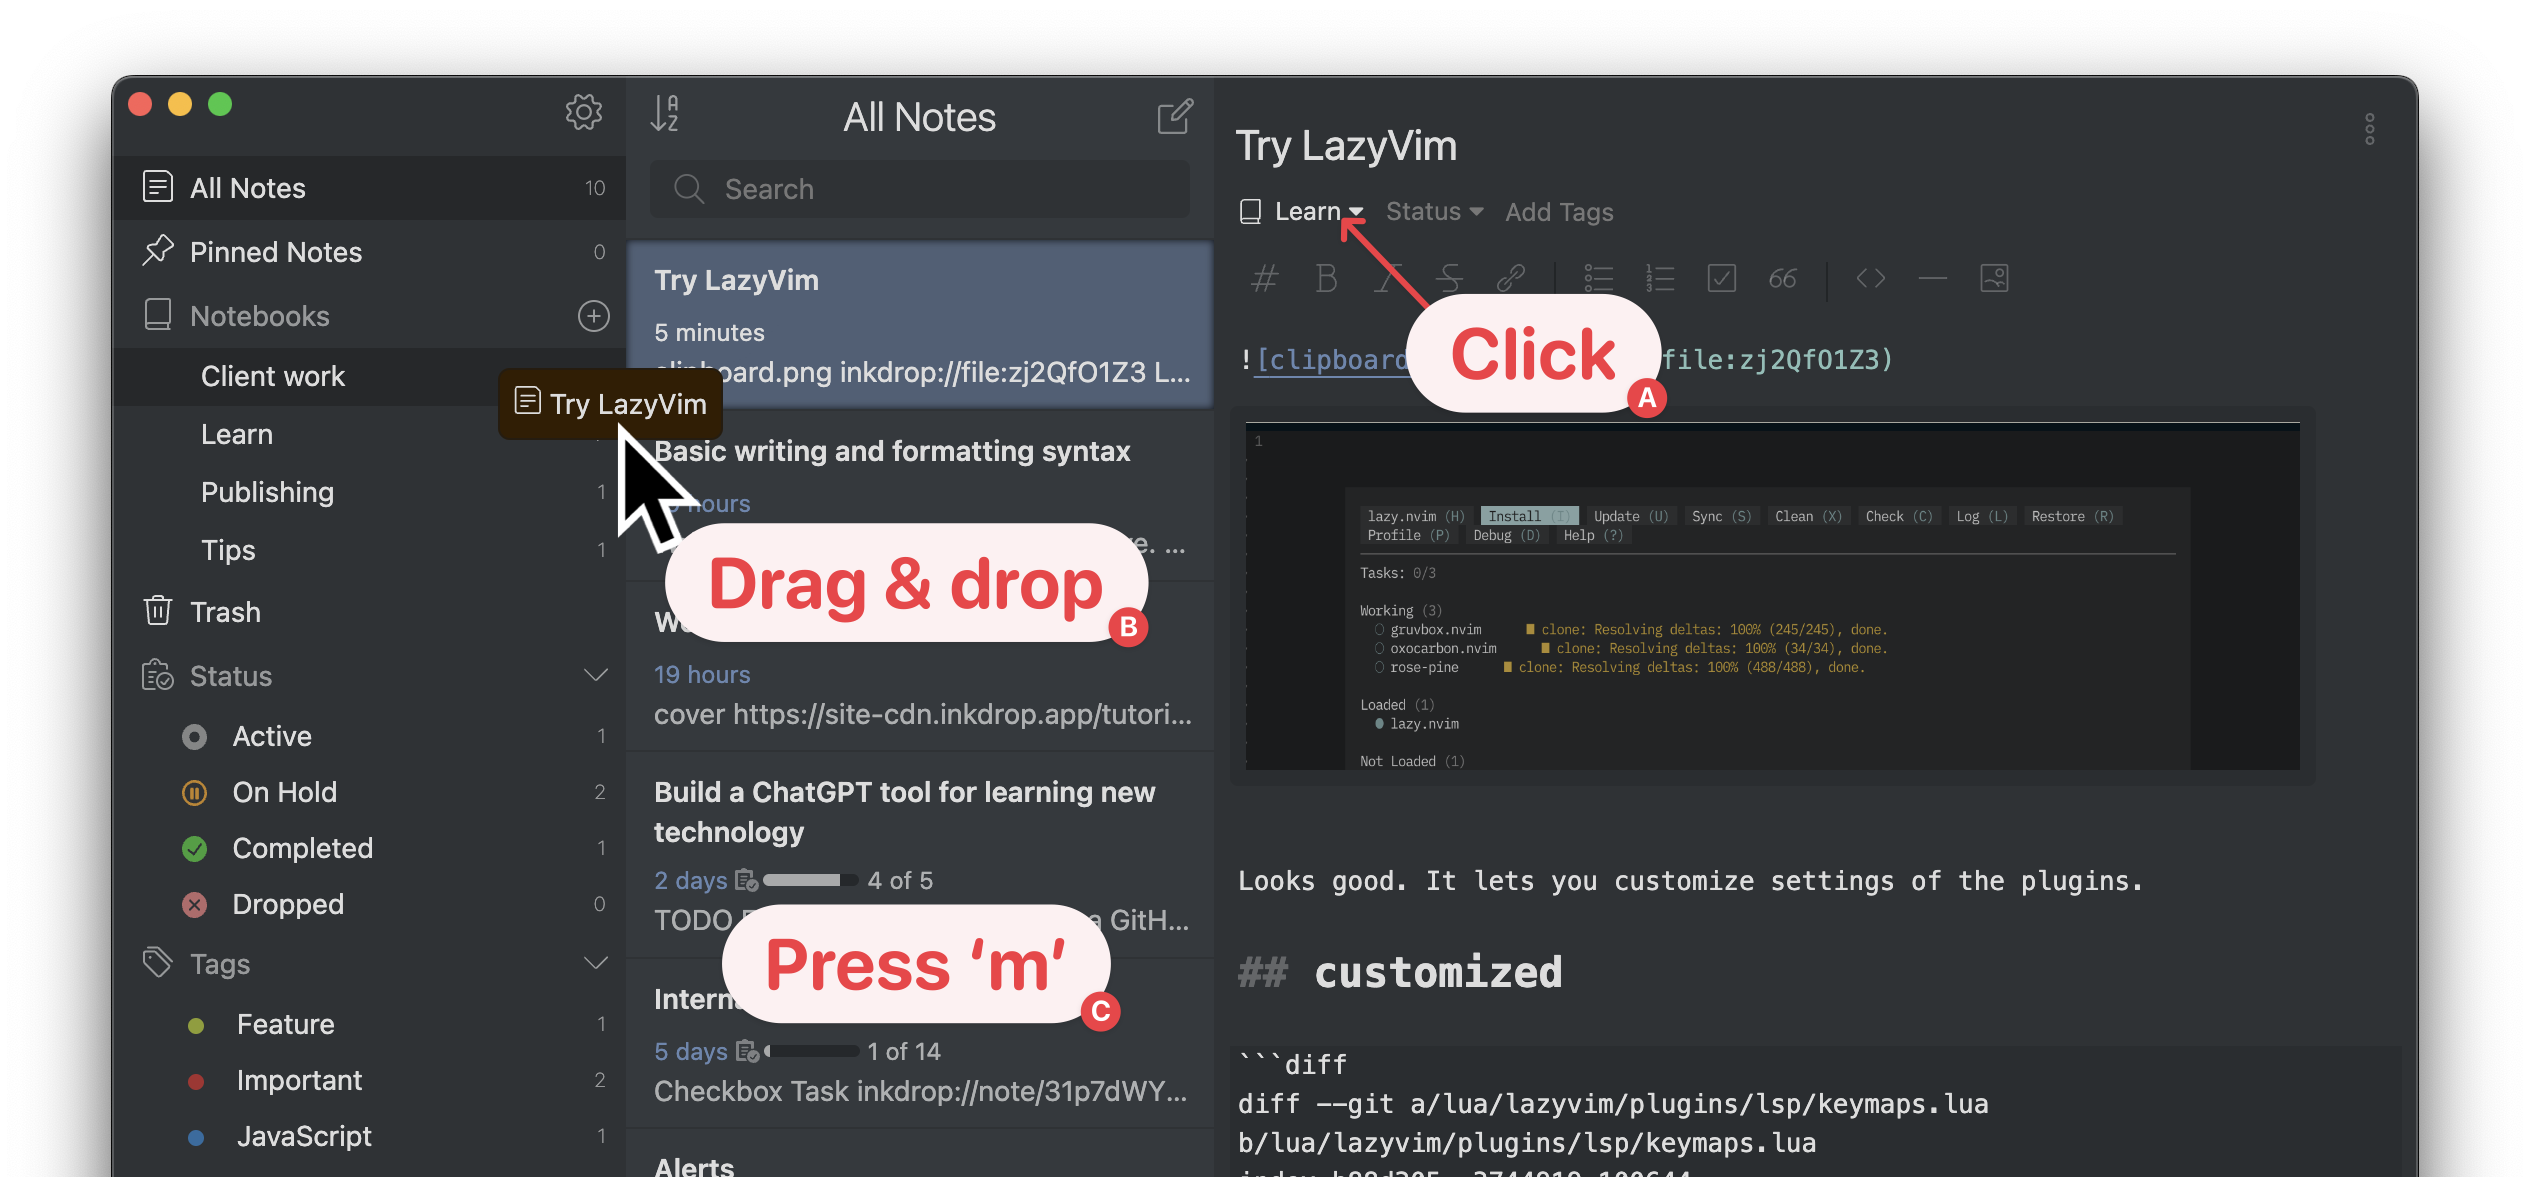
There are a few ways to move notes into a notebook (See the above screenshot):
- A. Click the notebook dropdown menu on the editor
- B. Drag & drop the note on the note list into the notebook on the sidebar
- C. Press m while the focus is on the note list
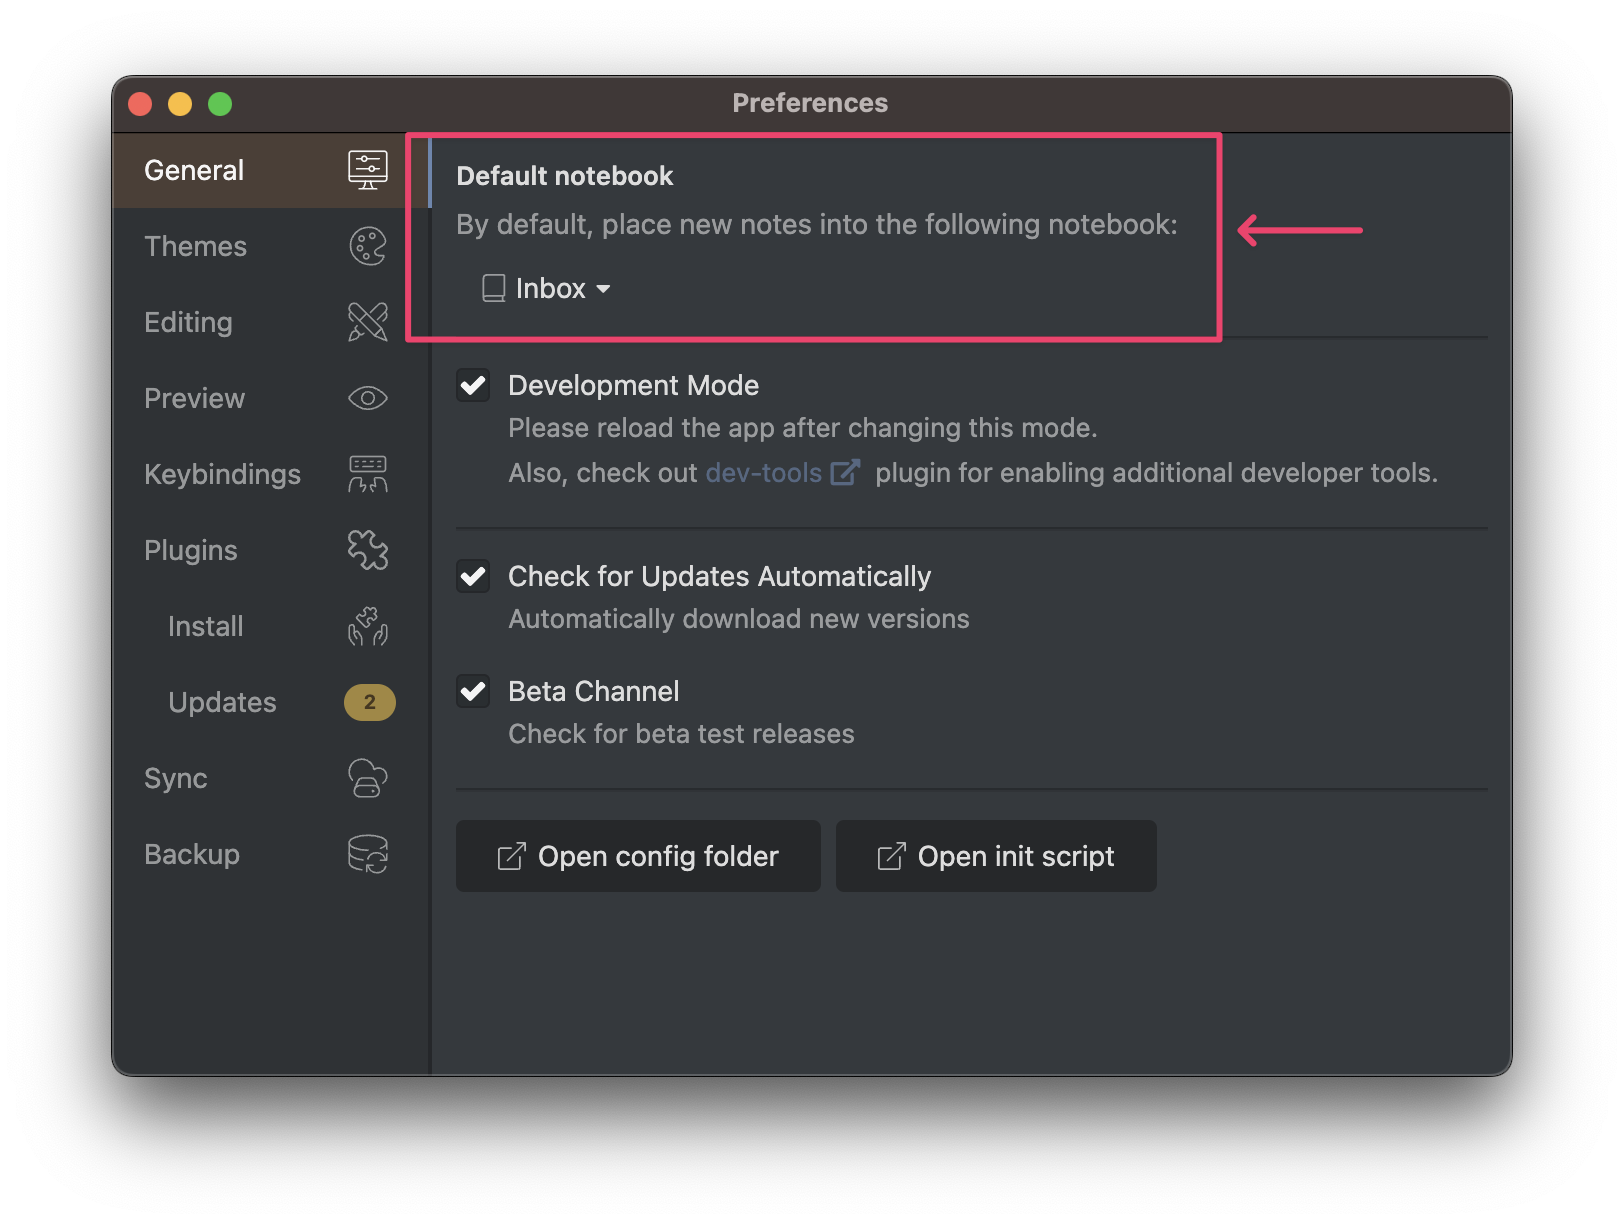
Configure the default notebook
When creating a new note in the All Notes section, it will be created in the default notebook. You may want to change it after creating notebooks. It can be changed from Inkdrop > Preferences > General > Default notebook.
Note statuses
Inkdrop can have several statuses for your notes, including 'Active', 'On Hold', 'Completed', and 'Dropped', which help you treat notes as tasks.
- Active: For tasks you’re currently working.
- On Hold: When you’ve paused work on a task.
- Completed: For tasks you’ve successfully finished.
- Dropped: For tasks you’ve decided to stop pursuing.
The notes with 'Completed' and 'Dropped' statuses are hidden in the note list by default when you view them via a notebook so you can focus on the active issues. You can view them by clicking the Completed and Dropped tabs on the sidebar.
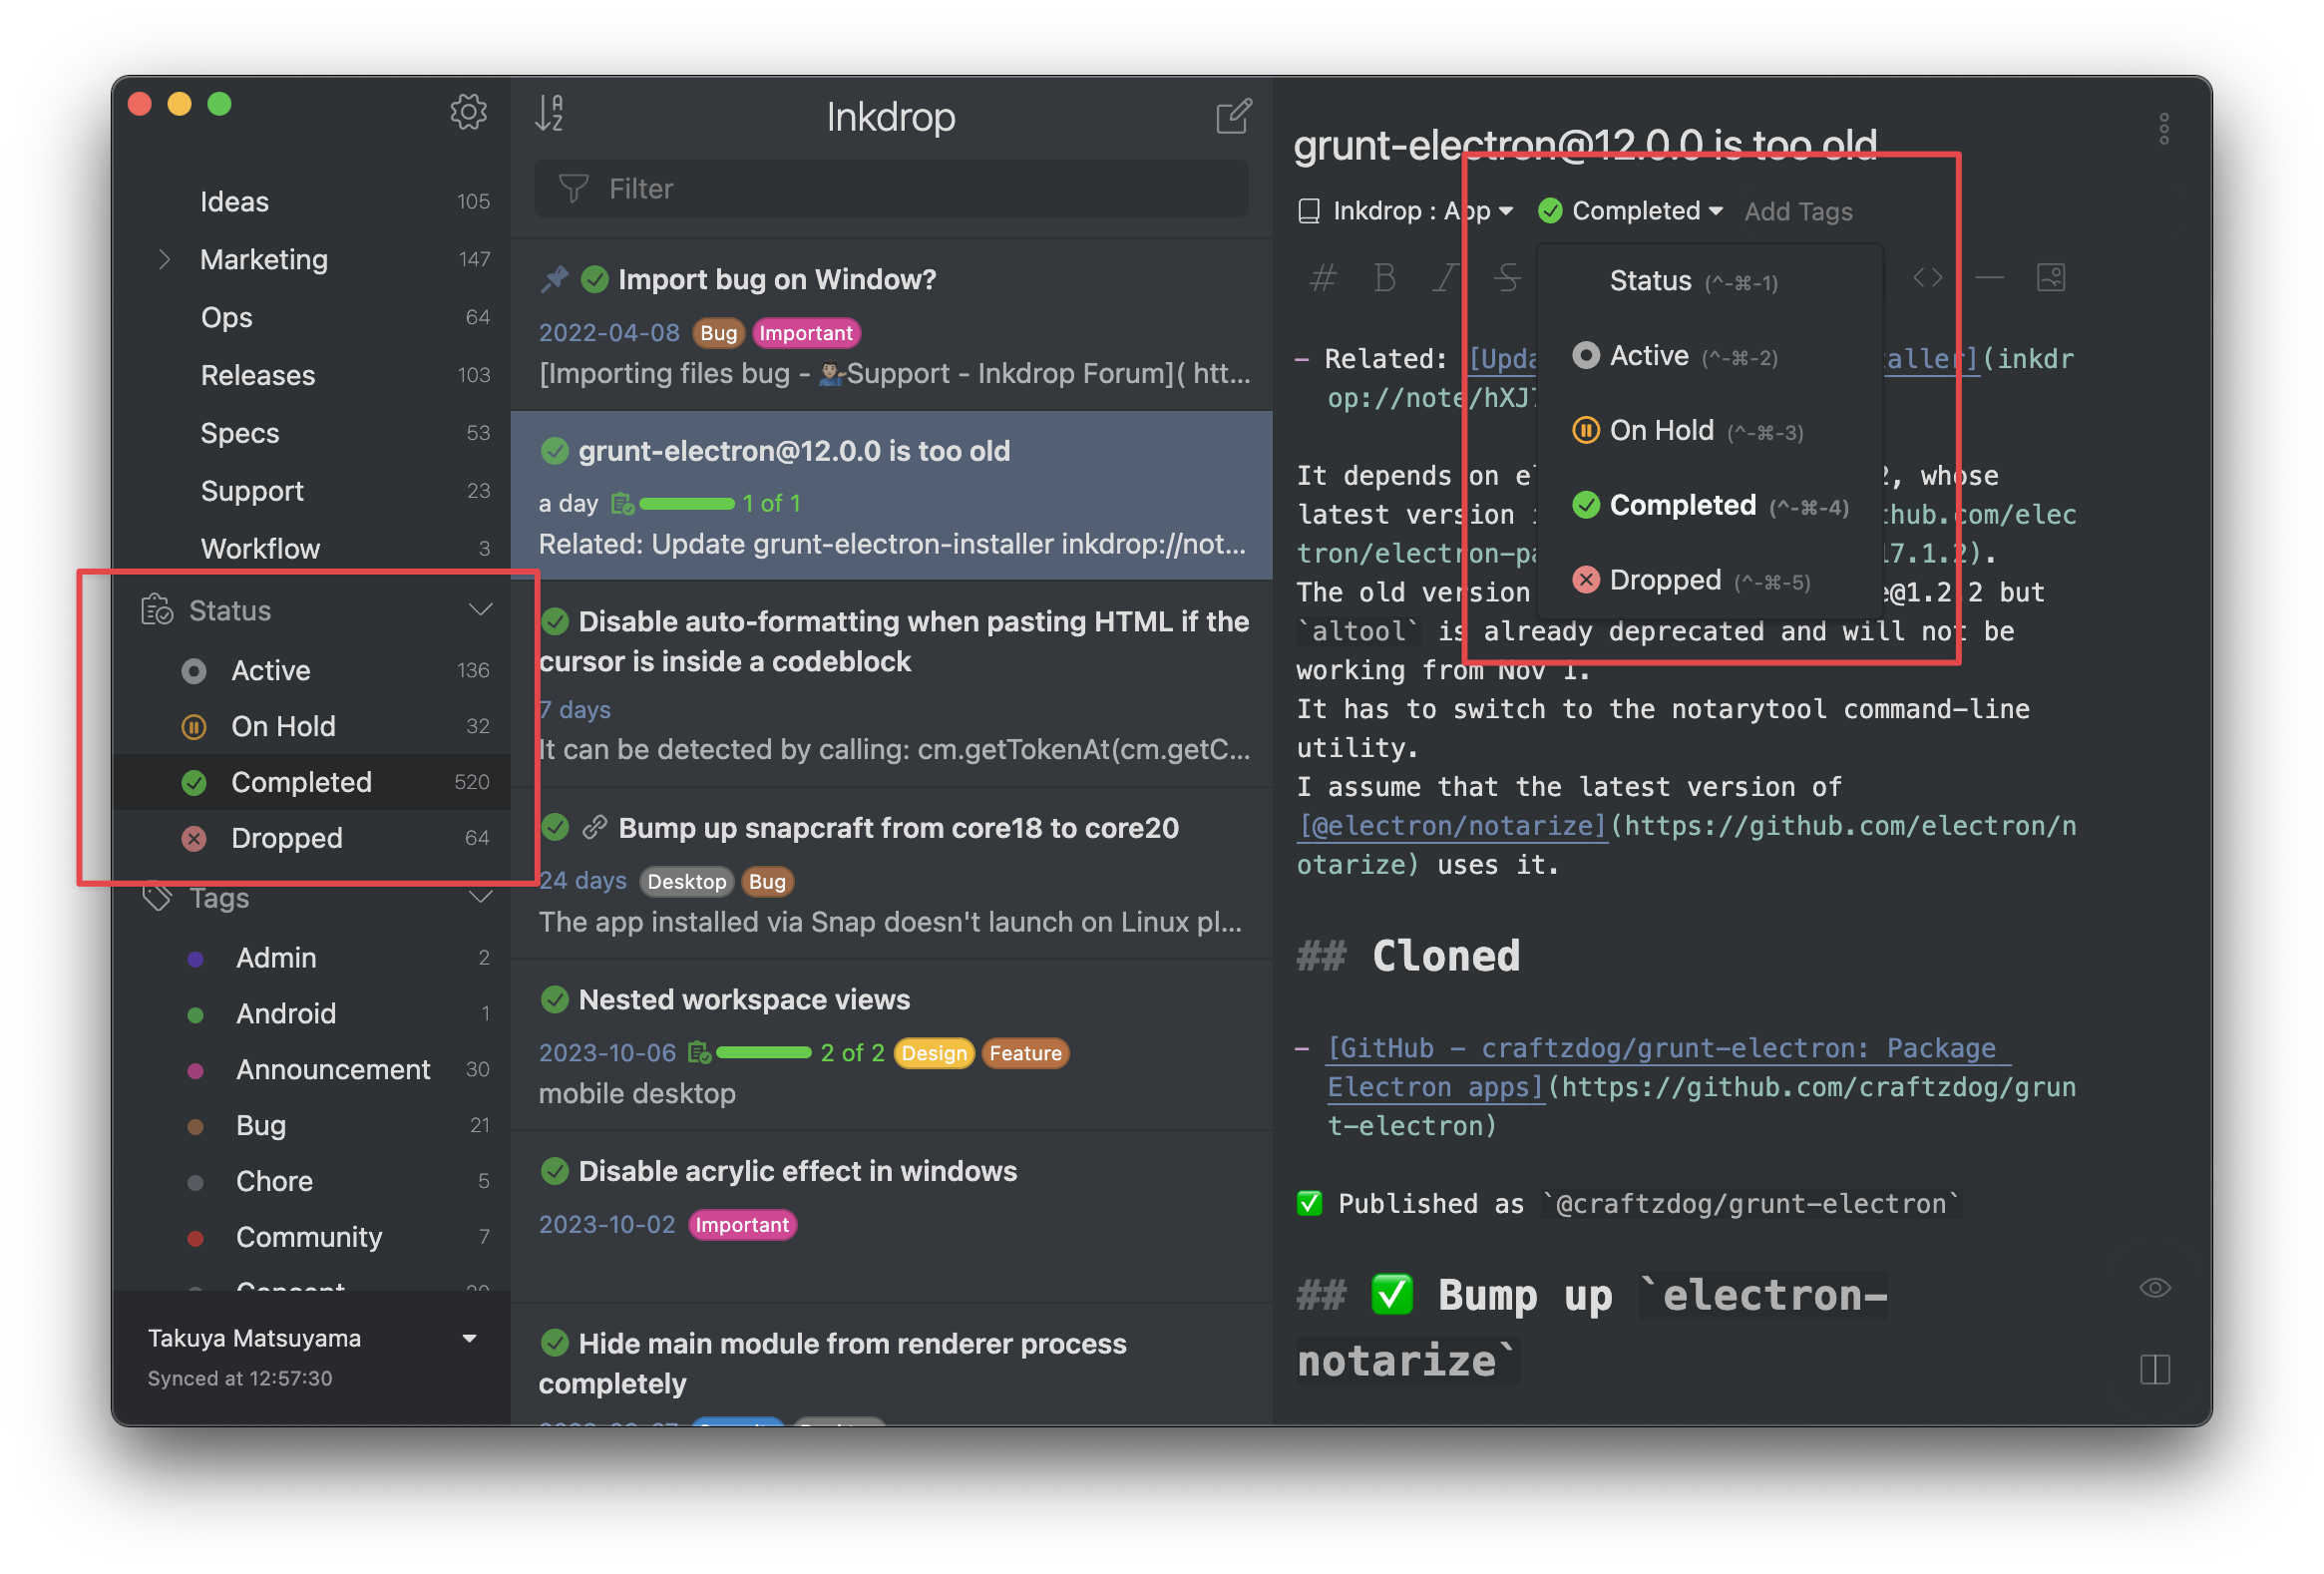
Assign a status to a note
To add a status to a note:
- Open the note that you want to mark with status.
- Under the note's title, click Status.
- Select a status from the list
Tags
Tags are like flexible labels that enable you to connect notes with one another. The differences between notebooks and tags are:
- A note can be associated with multiple tags, whereas it can only belong to one notebook at a time.
- Tags are visible on the note list, and you can customize tag colors for easy visual identification.
For example, if you're tracking bugs in your project, tagging those notes with a label named 'Bug' makes them stand out. Tags can reflect anything from importance levels to specific subjects like frameworks, platforms, release version numbers, severity, or concepts.
To tag a note:
- Open the note you want to tag.
- Under the note's title, enter the tag name in the Add Tags field.
Inkdrop suggests already existing tags as you enter. - Press Enter to add the tag to the note.
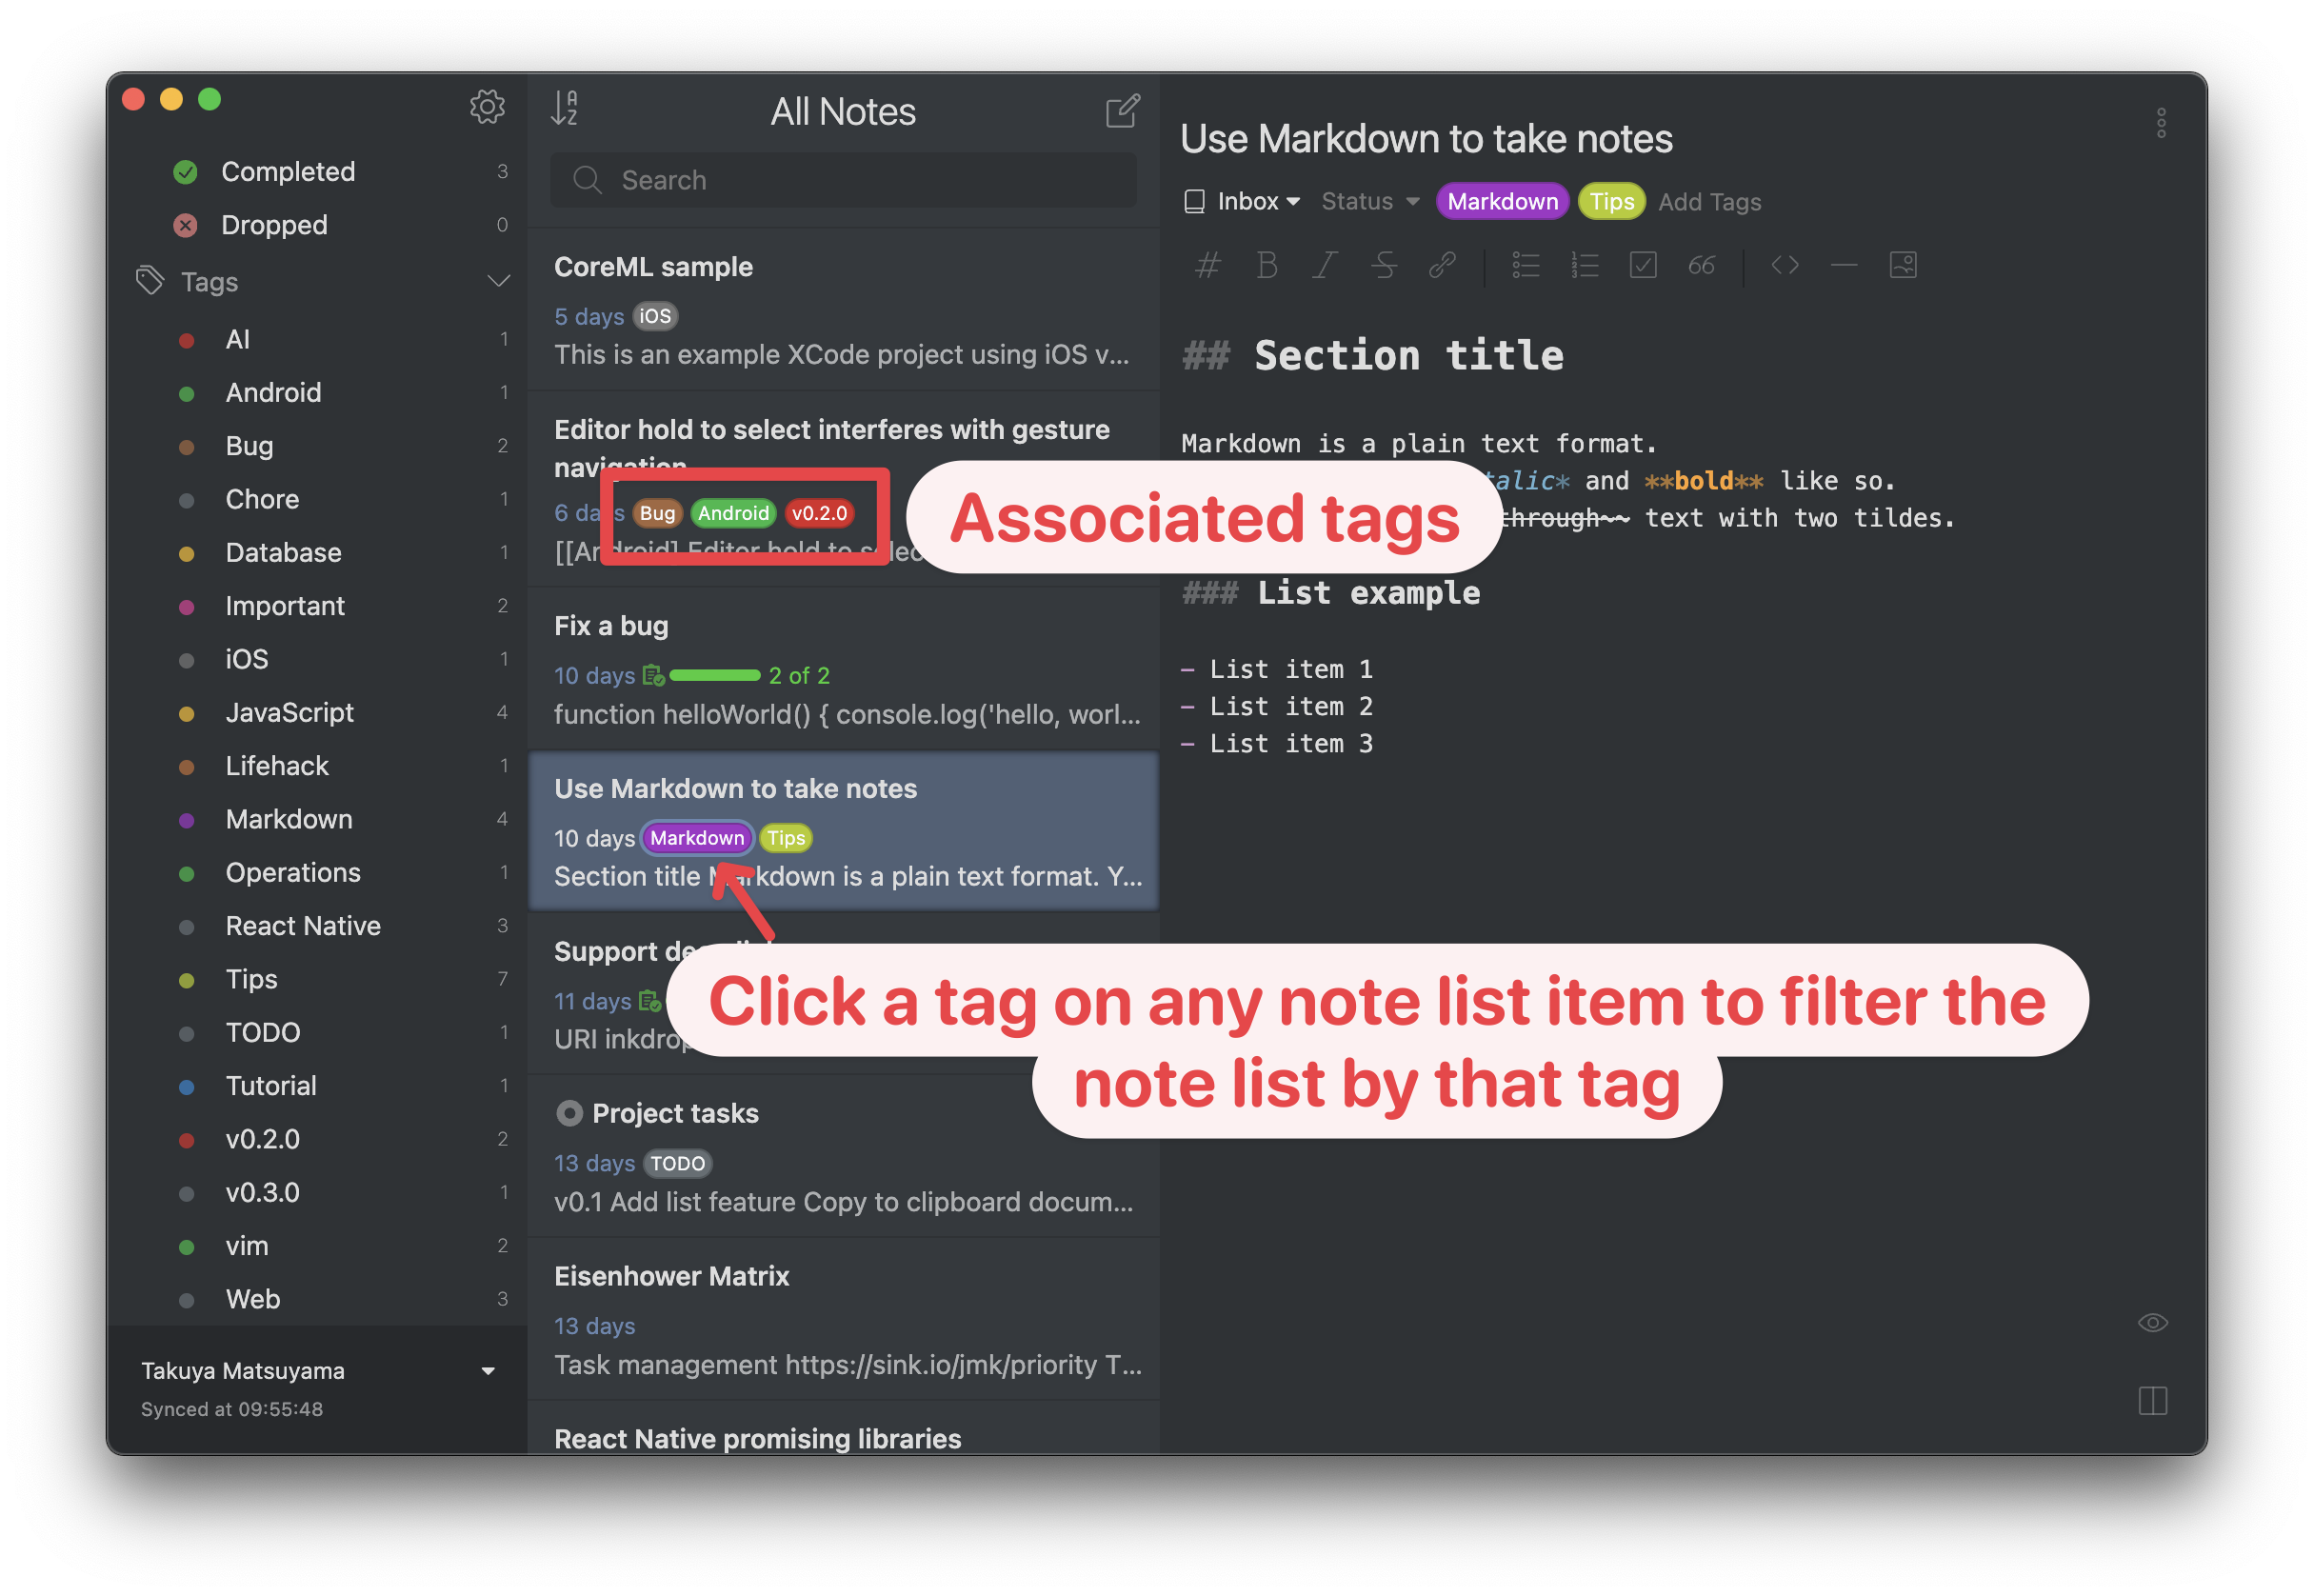
You can quickly filter by a tag by clicking one on the note list. By selecting multiple tags, you can narrow down your note list to include only the notes that meet all selected criteria, making it even easier to find exactly what you’re looking for.
Go back/forth with keyboard, mouse, or trackpad
As you view your notes, Inkdrop remembers in what order you opened them. It lets you go through the history of the viewed notes back and forth. There're several options to see the viewed notes.
For the instructions on how to configure, see this page.
Via keyboard
| macOS | Windows/Linux | Action |
|---|---|---|
| Command + ← | Alt + ← | Go to previous note |
| Command + → | Alt + → | Go to next note |
Via application menu
To navigate between notes via the app menu:
- Click View and then select Back or Forward.
Via mouse buttons
You can use third and fourth buttons on your mouse to navigate back and forth through your viewed notes.
Via touchpad gestures
You can use gestures on the touchpad to navigate the history of viewed notes.
Workspace view
By default, the sidebar shows all notebooks, statuses, and tags fetched from the database. They're mixed together, and it can be challenging to understand which entity belongs to which notebook.
To display entities of a specific notebook:
- Hover over the notebook and click Detail next to its name. You can also open a notebook and press Enter.
The sidebar only shows sub-notebooks, statuses, and tags of the selected notebook so you can focus on specific information.
Get help