Basics
Write notes
Notes are the central piece in the Inkdrop universe. You can perform all CRUD operations (create, read, update, and delete) with them, duplicate, and export notes in various formats. Inkdrop supports both standard Markdown syntax and the GitHub Flavored Markdown (GFM) with inline formatting.
Create notes
To create a note:
- Click in the upper-right corner of the note list.
You can also use the Command+N / Ctrl+N shortcut.
An untitled empty note is created. Name the note, so it'll be easier to look for later.
Delete notes
To delete a note, right-click the note and select the Move to trash option. Alternatively, you can select a note with a left-click and use the Command+Del / Delete shortcut.
Inkdrop also lets you delete multiple notes at once. To do this:
- Holding the Command / Ctrl key, select the notes you want to delete.
Inkdrop shows the number of selected notes in the rightmost area. - On the right screen, click Move to Trash.
Restore deleted notes
Inkdrop lets you restore the deleted notes.
To restore notes:
- In the sidebar, click Trash.
- Select the notes you want to restore and click Move to Notebook in the rightmost area.
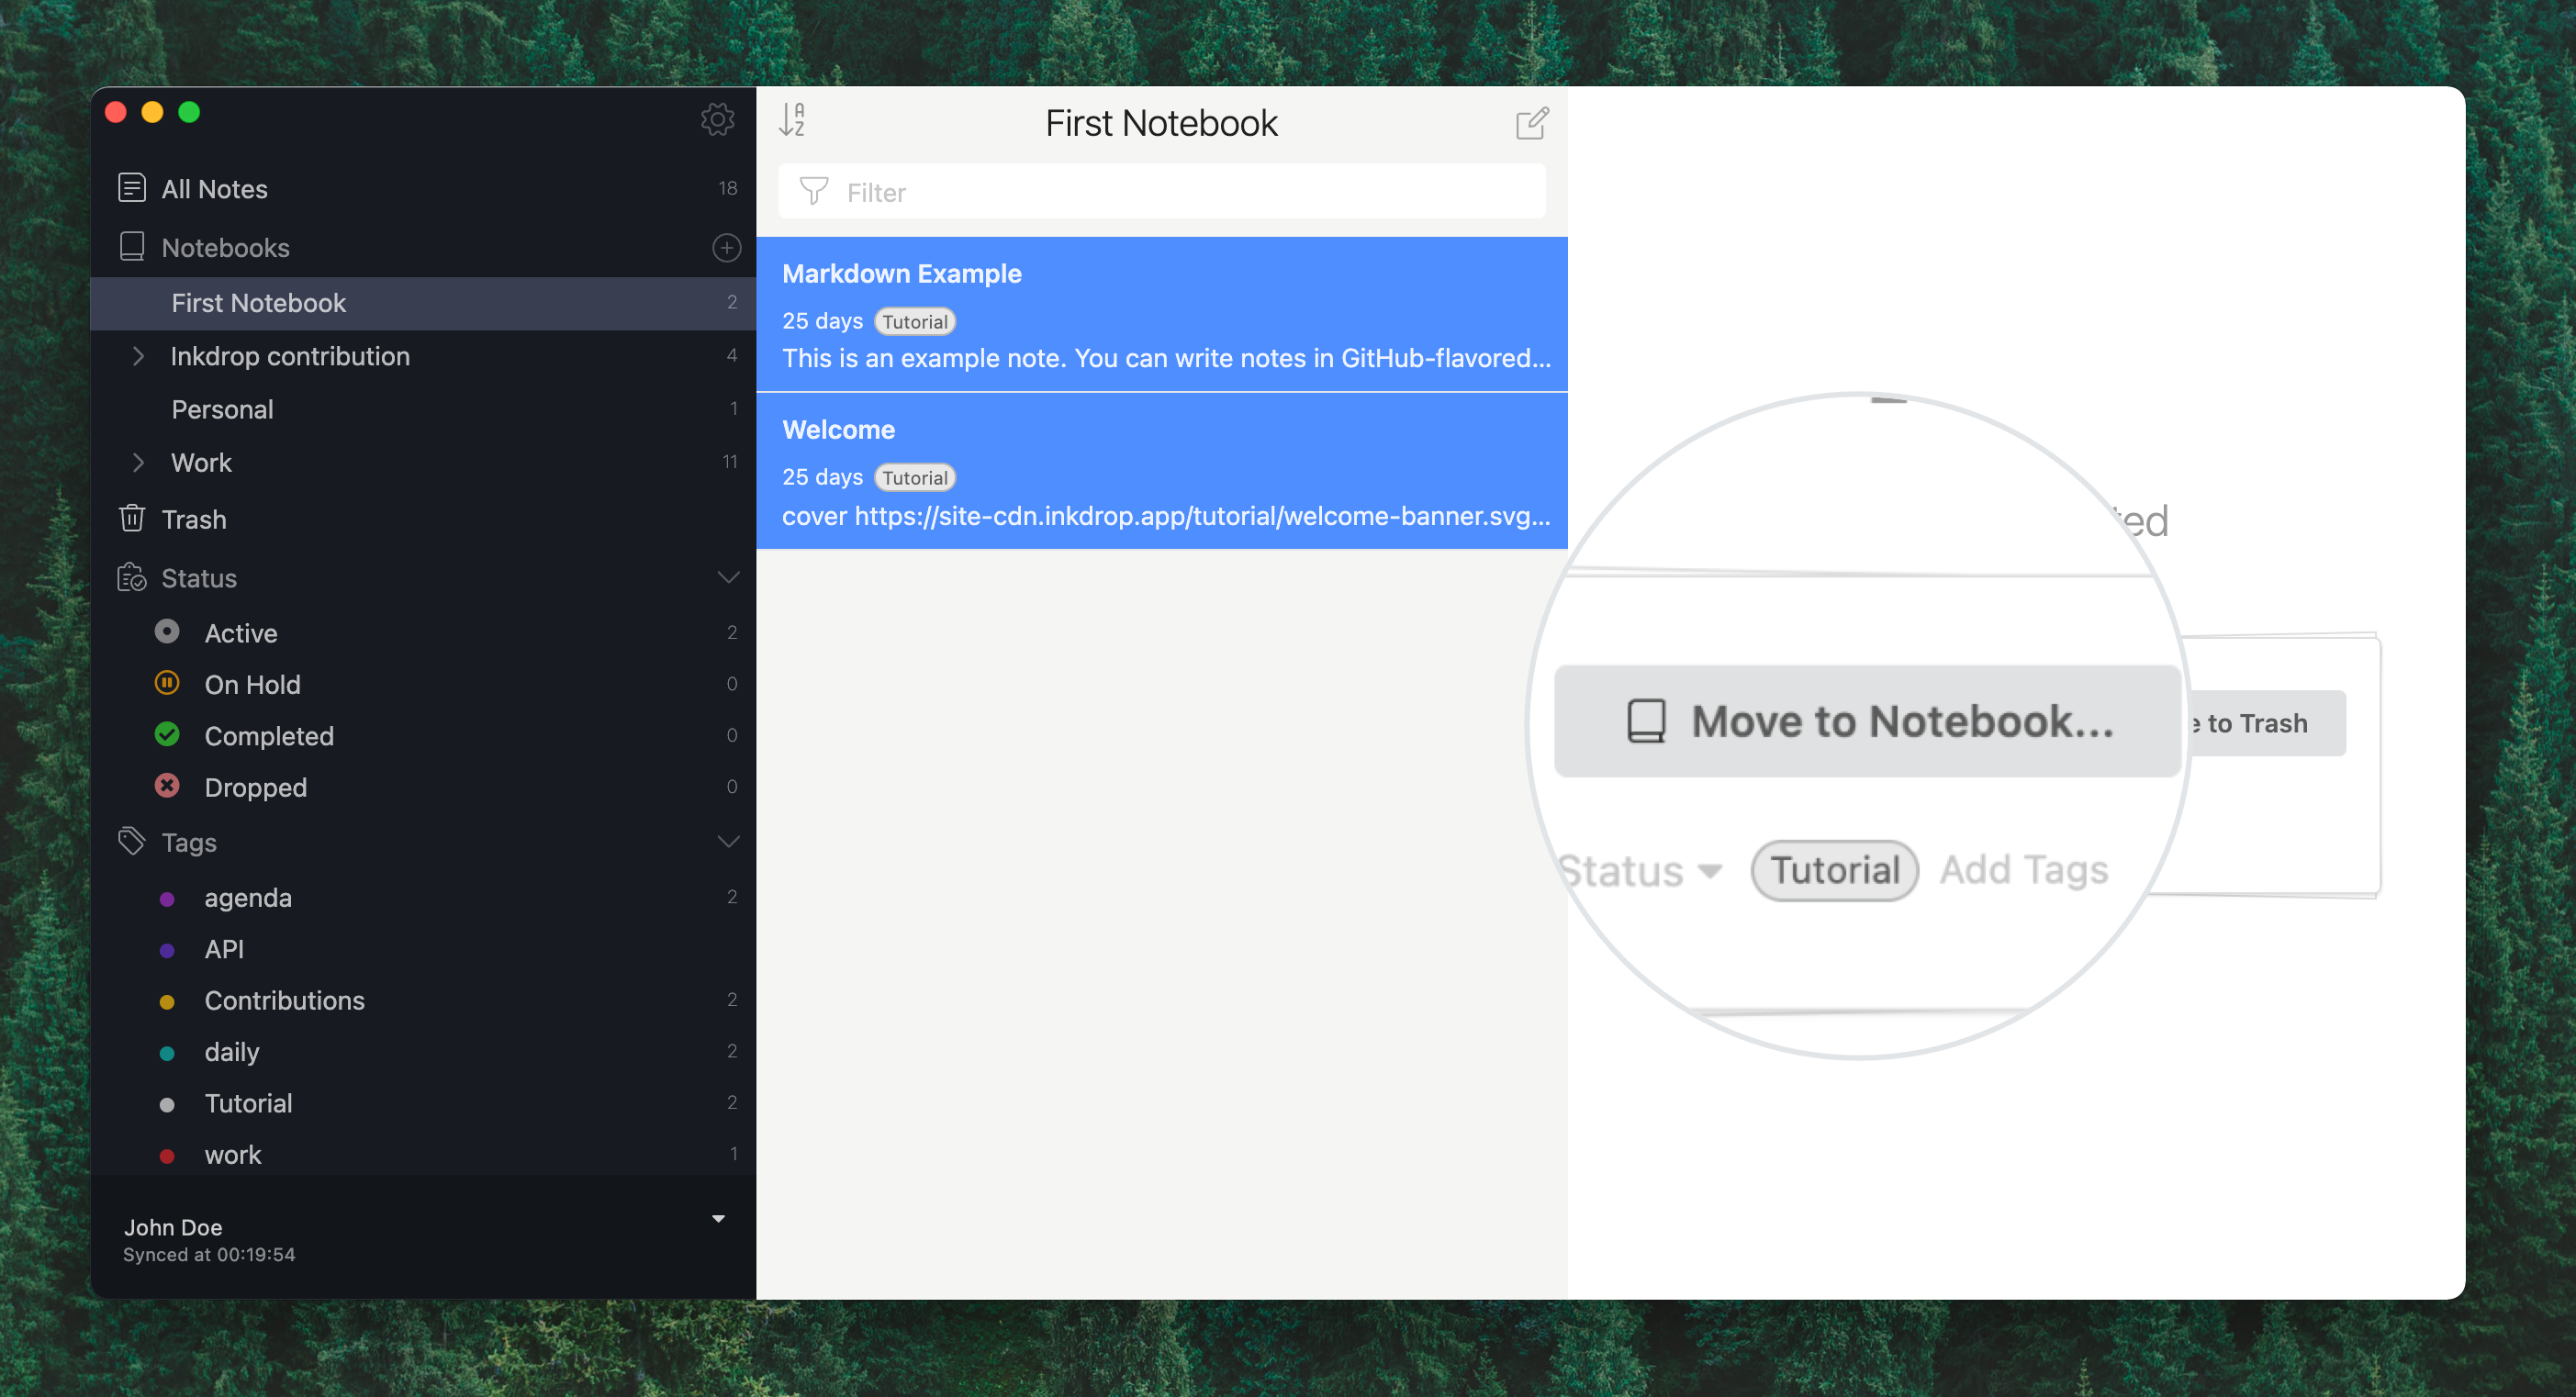
- In the Move to Notebook dialog, select a notebook where you want to restore the notes.
The notes are restored to the selected notebook.
Delete notes permanently
Warning
If you delete your notes permanently, there's no way to restore them.
To delete notes permanently:
- In the sidebar, click Trash.
- Select the notes you want to delete permanently and click Delete Permanently in the rightmost area.
The notes are deleted forever.
Copy notes
Inkdrop lets you make a complete copy of notes. The copy has title, content, and tags of its original note.
To duplicate notes:
- Right-click the note to copy and select Duplicate.
Alternatively, select the note and use the Command+D shortcut.
The copy is created in the current notebook.
Tag notes
Tags are keywords that you can add to notes, so they're easier to group and find. For example, you can add the react tag to all notes related to the technology. Tags help you organize and browse your notes a lot easier.
Note
You can use emojis to name tags. For example, if you learn a new language, you can tag the language-related notes with the corresponding country flag 🇮🇹
To tag a note:
- Open the note you want to tag.
- Under the note's title, enter the tag name in the Add Tags field.
Inkdrop suggests already existing tags as you enter. - Press Enter to add the tag to the note.
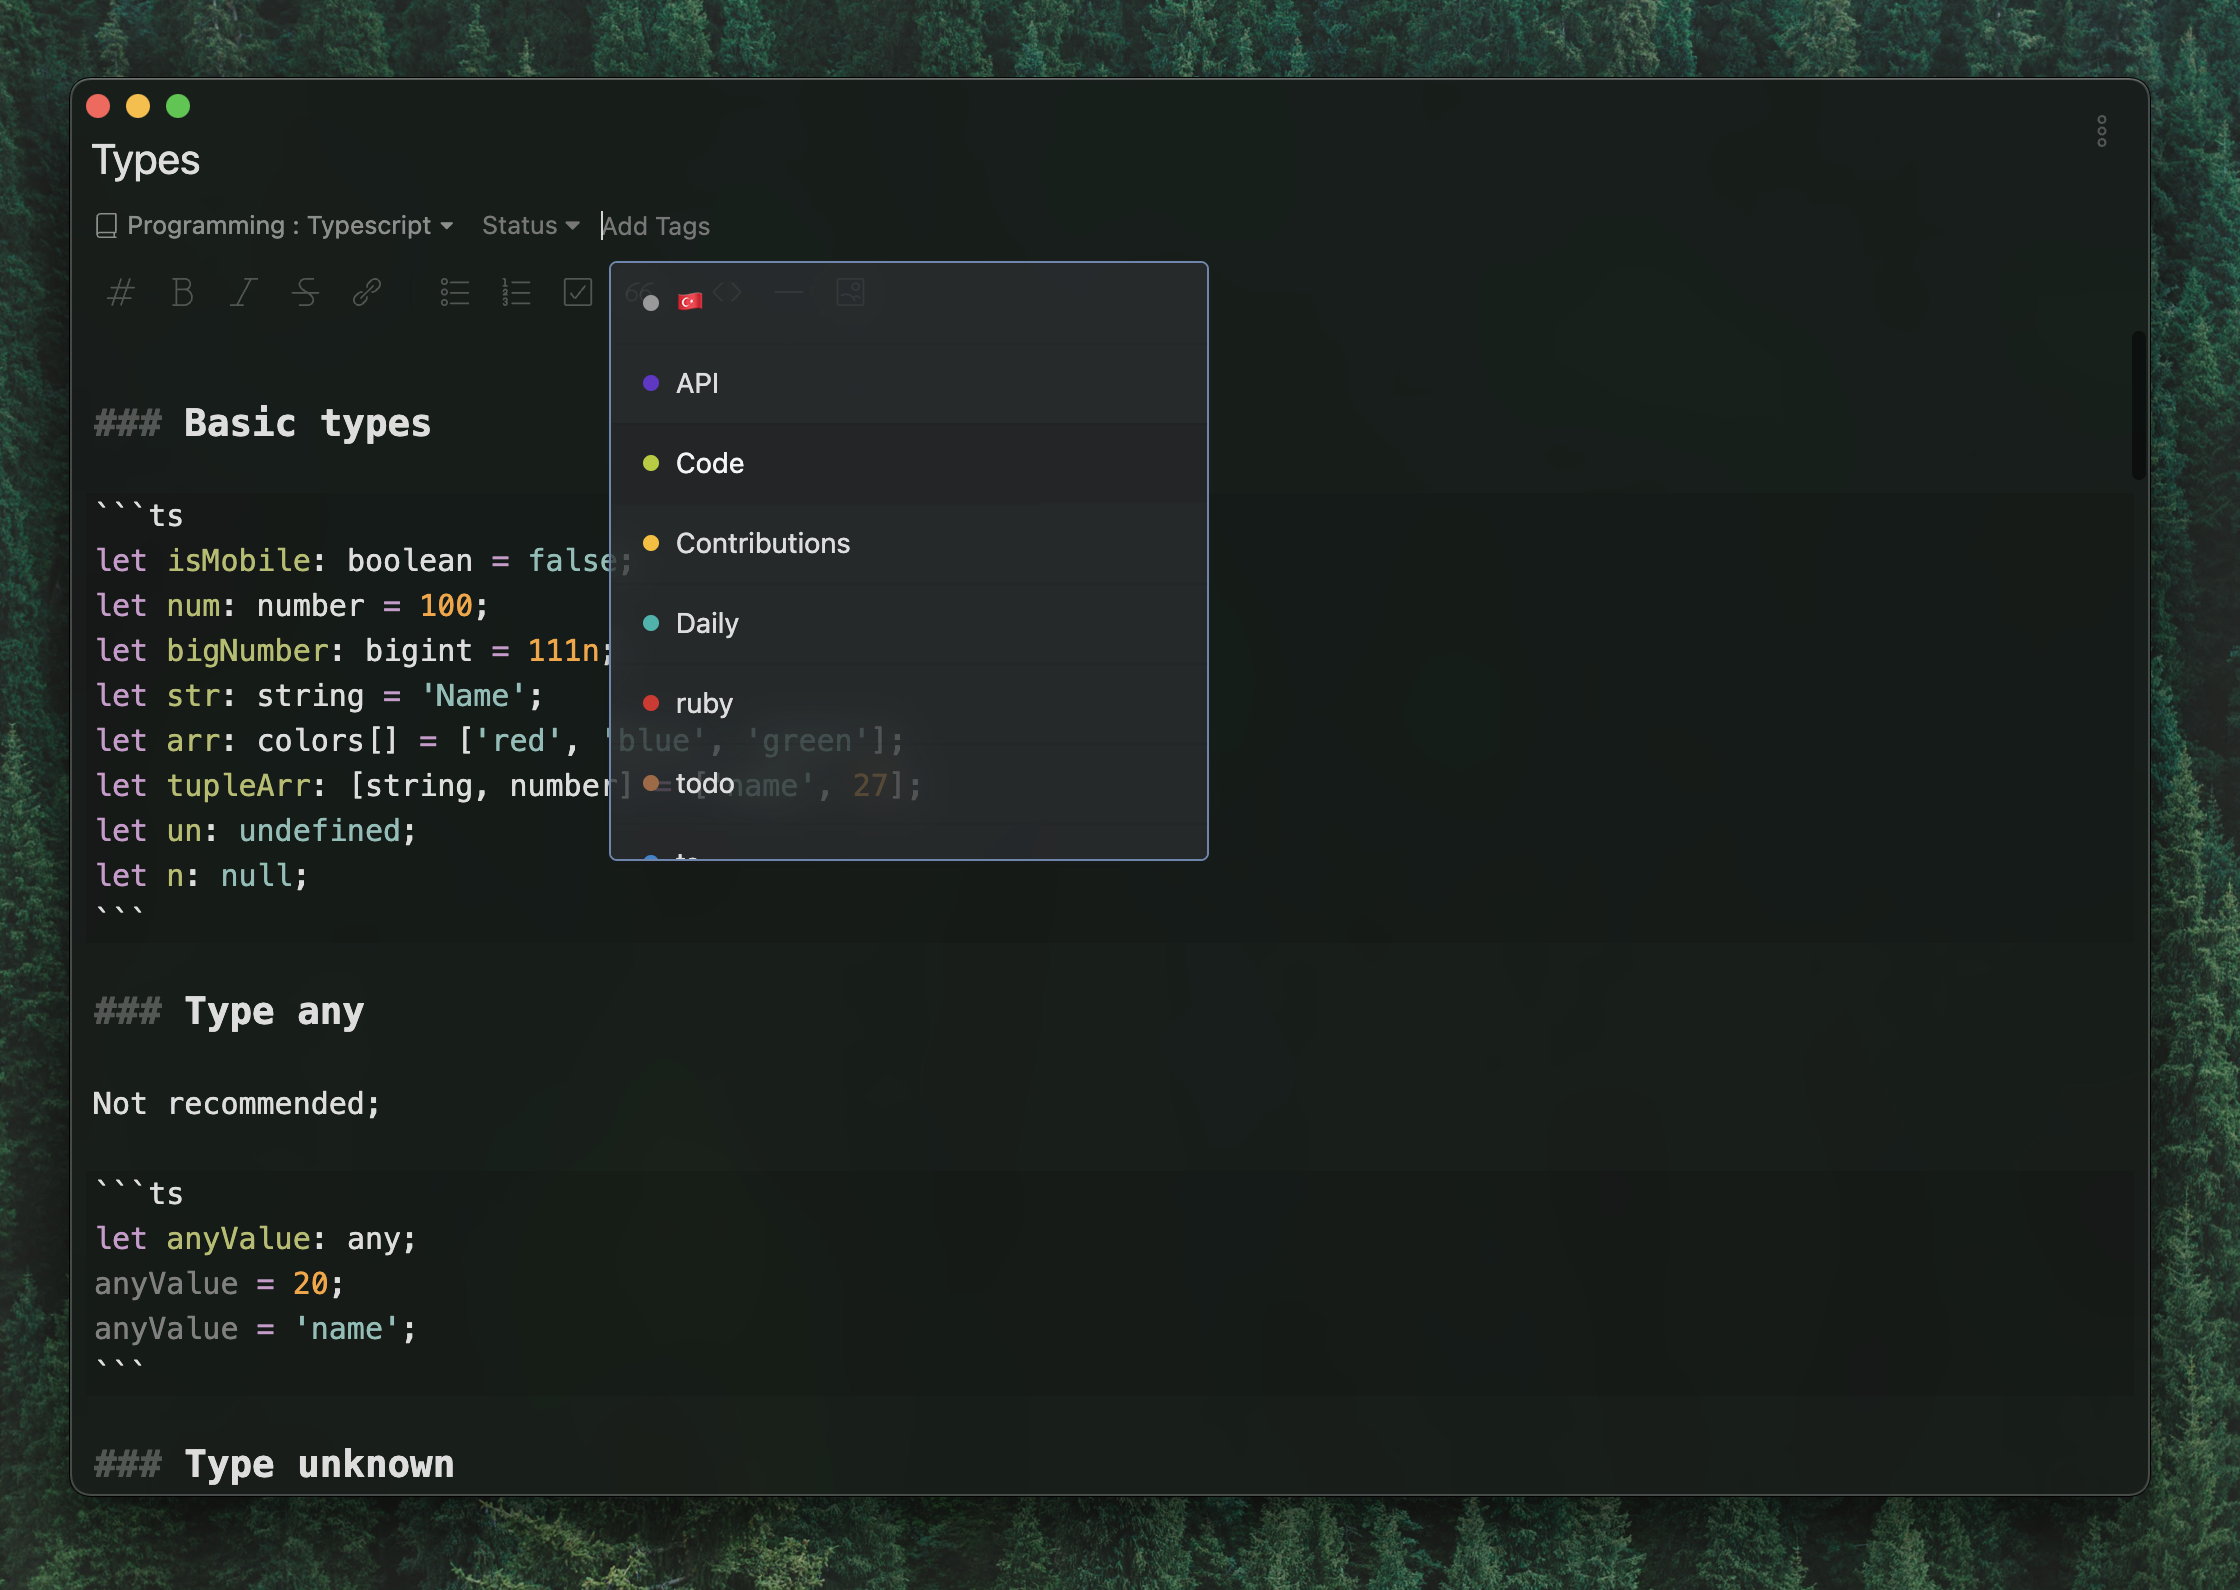
If it's a new tag, Inkdrop automatically adds it to the Tags list. You can find the list in the sidebar.
Live preview
Inkdrop lets you preview notes to see what they eventually look like.
To preview a note:
- Open a note and use Command+P / Ctrl+P.
The note and its preview are displayed side-by-side.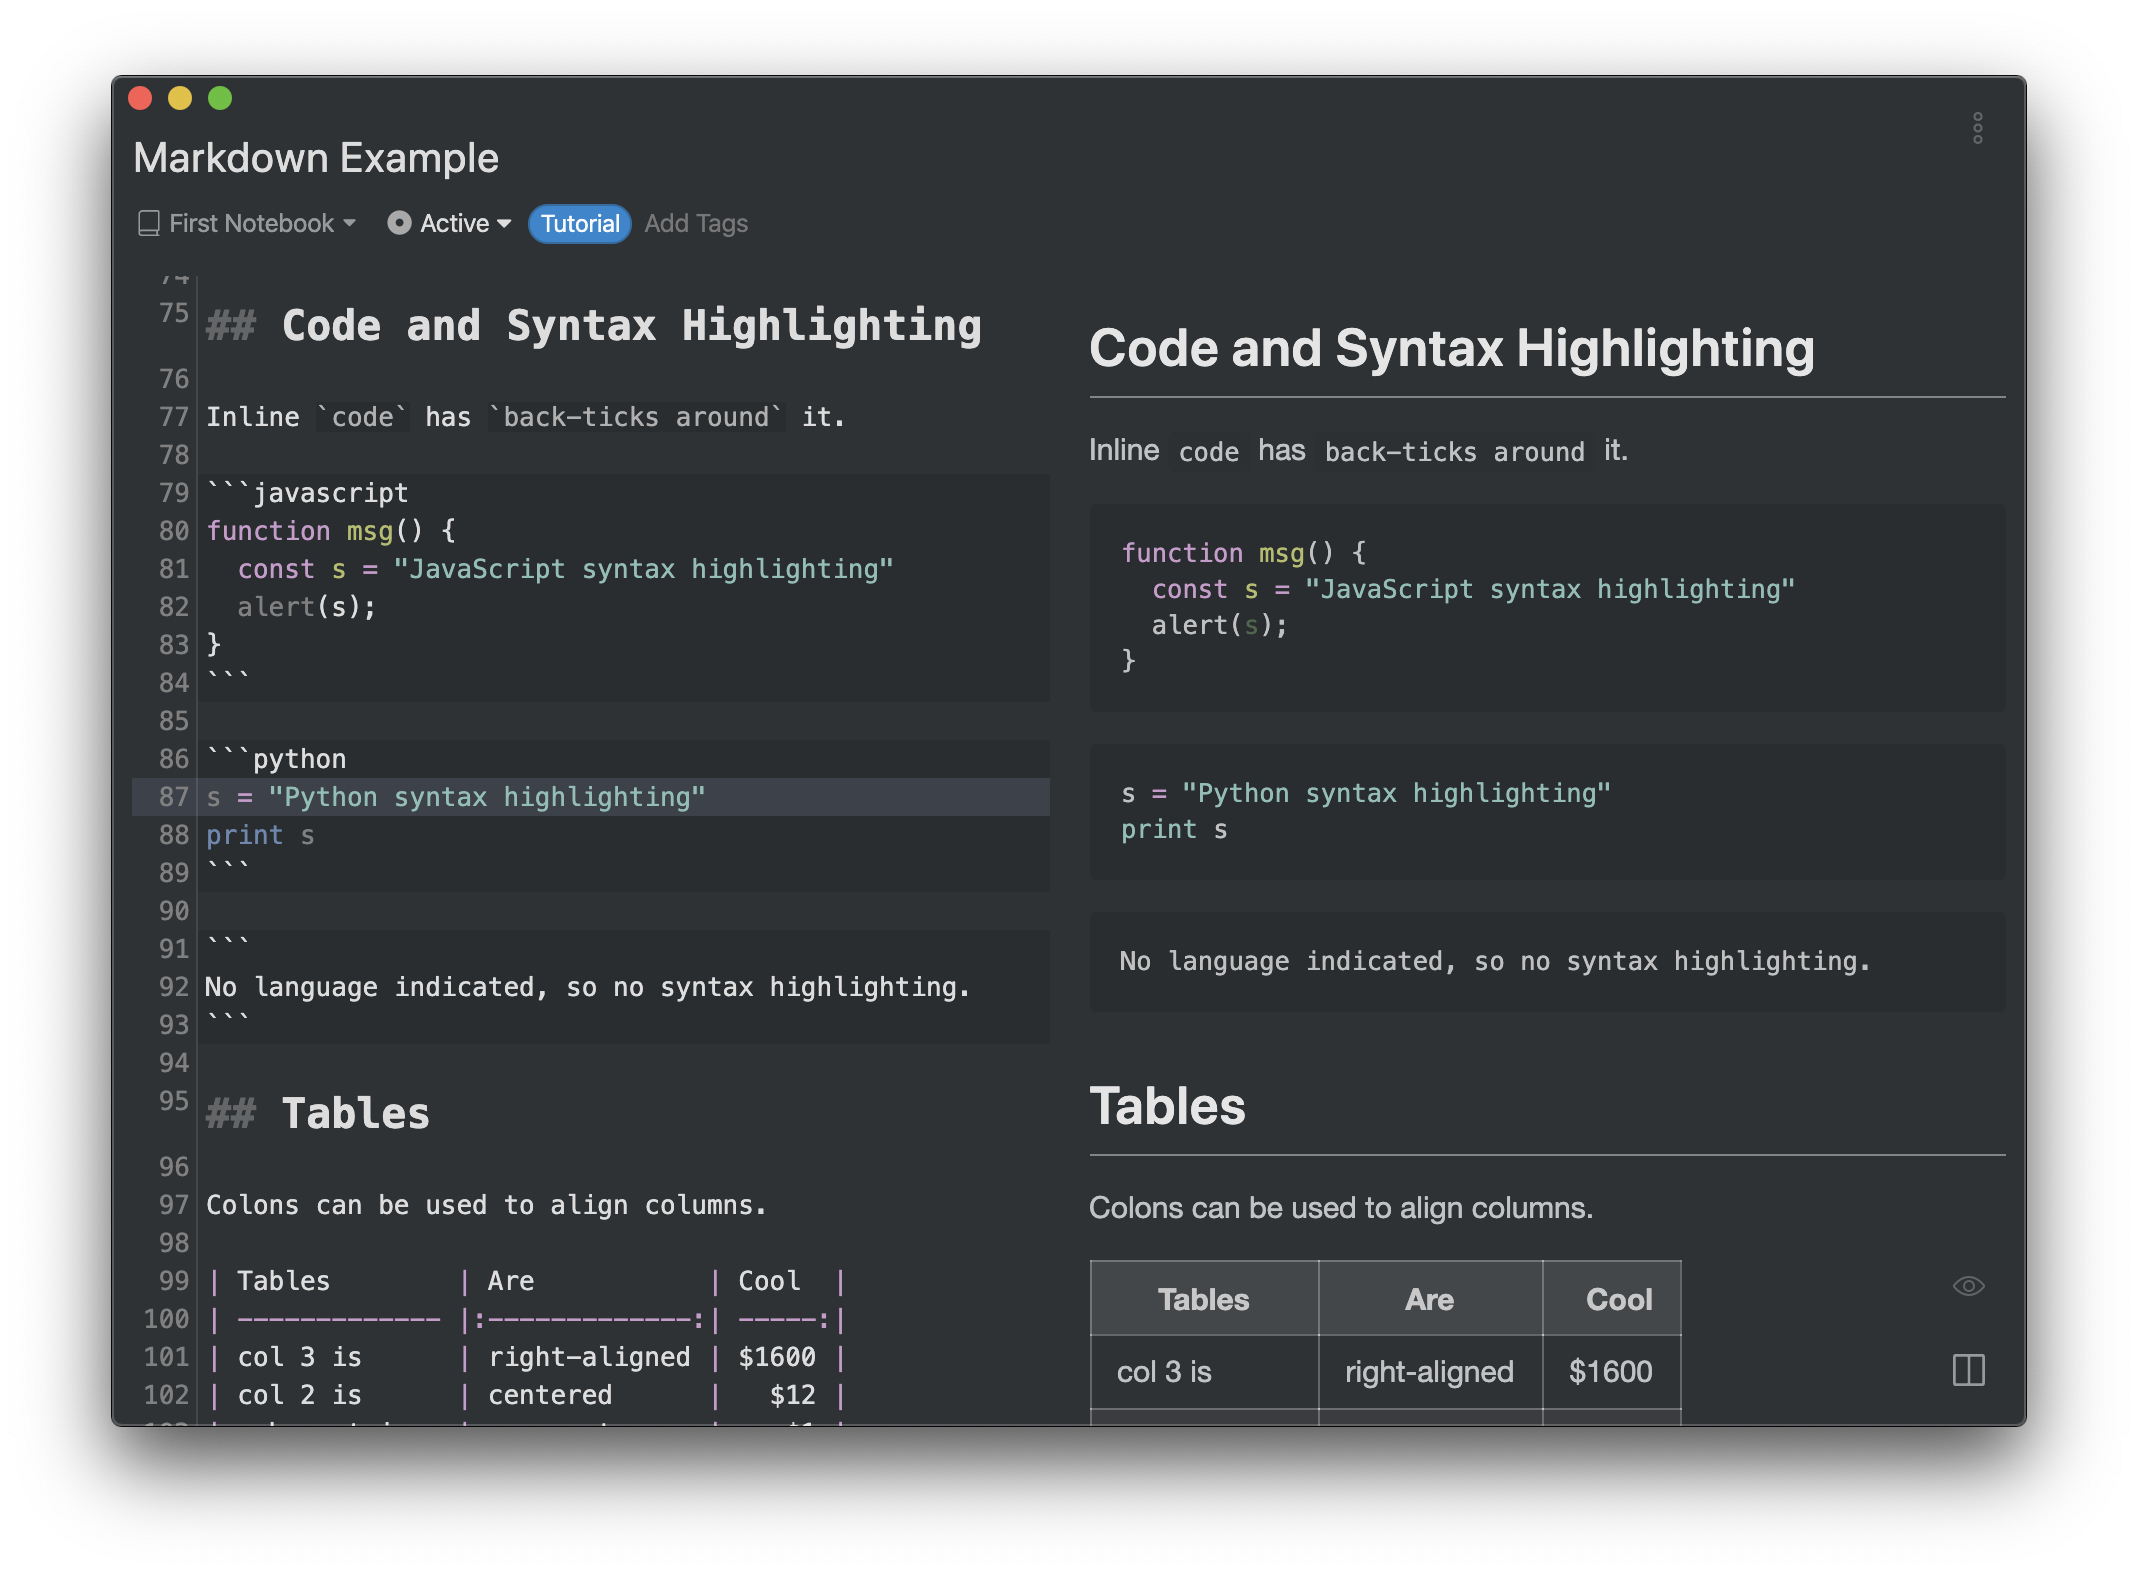
There're 2 more ways to toggle preview. In the lower right corner of the editor:
- Click to switch between the note and its preview.
- Click to toggle note and its preview side-by-side.
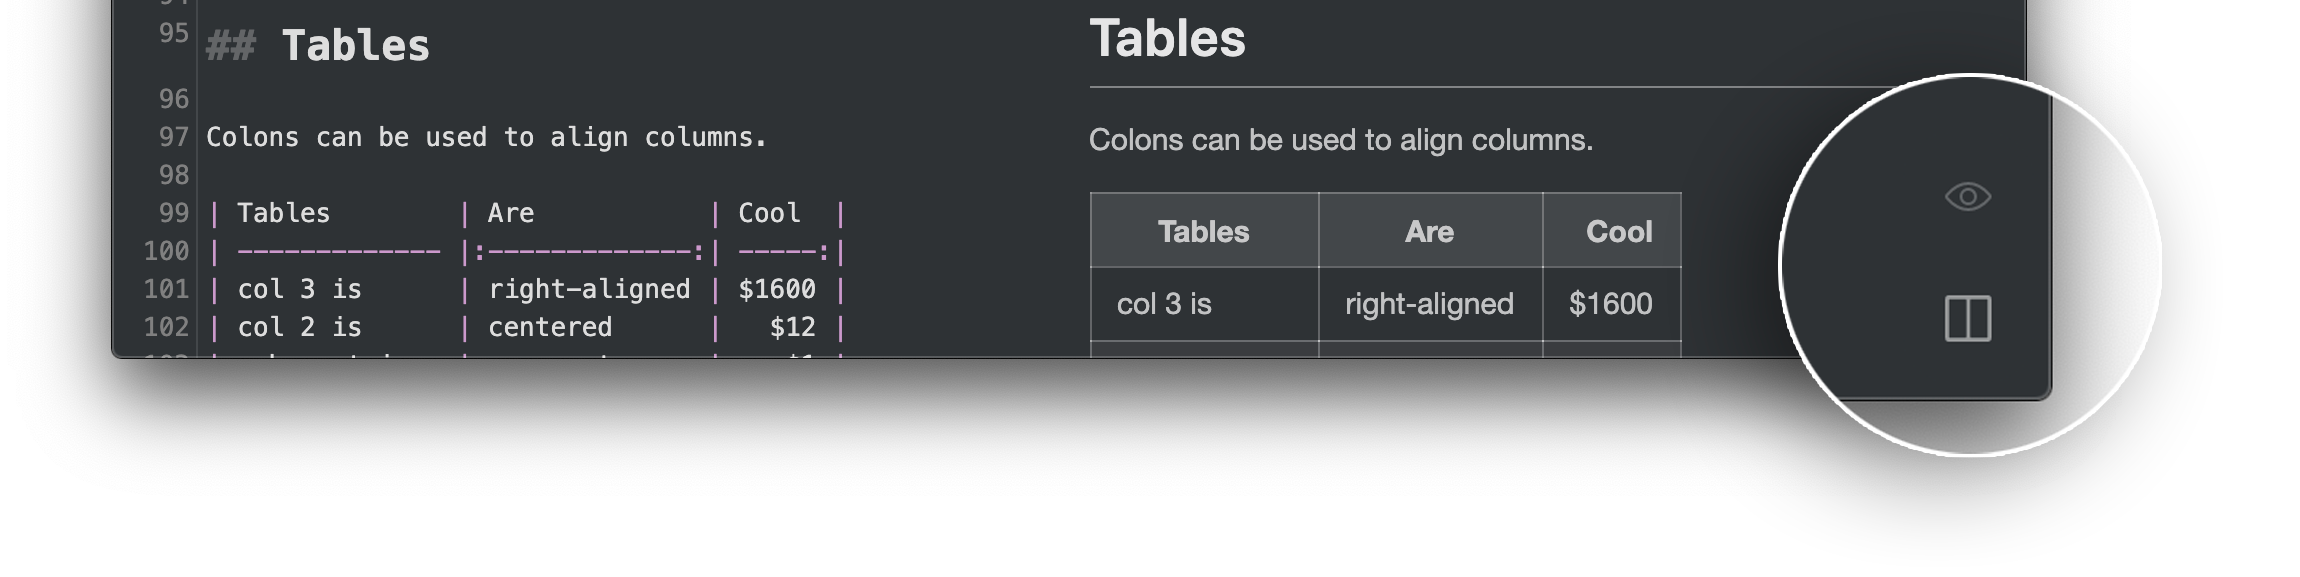
Notice
Note that the icons are hidden by default. Hover the mouse cursor over the editor and icons will appear in the lower right corner of the editor.
Distraction Free Mode
'Distraction Free Mode' lets you focus on the writing process by hiding the sidebar and note list.
To toggle the 'Distraction Free Mode':
- Use Command+Shift+D / Ctrl+Shift+D.
You can even hide the toolbar with controls for quick formatting. For this, take the following steps:
- Open Preferences by clicking the icon in the upper right corner of the sidebar.
You can also use Command+, / Ctrl+,. - Go to Editing and clear the Toolbar checkbox.
The toolbar is hidden.
Get help